- Purchase order from HQ to Store
- Transfer order from HQ to Store
- Transfer order from Store to HQ
- Counting journal from HQ to Store
- Counting journal from Store to HQ
- POS Sale from Store to HQ (periodically)
Purchase orders are created at the head office. If a retail warehouse is included in the purchase order header, the order can be received at the store by using Microsoft Dynamics AX for Retail POS. After the quantities that are received at the store are entered, they can be saved locally for additional modification. Alternatively, the quantities can be committed and sent to the head office. At the head office, the quantities that were received at the store are displayed in Microsoft Dynamics AX, in the Receive now field on the purchase order.
Step 1: create a purchase order for the New York store. The inventory transaction linked to this purchase order line receives the “Receipt status = Ordered”. Confirm the purchase order.
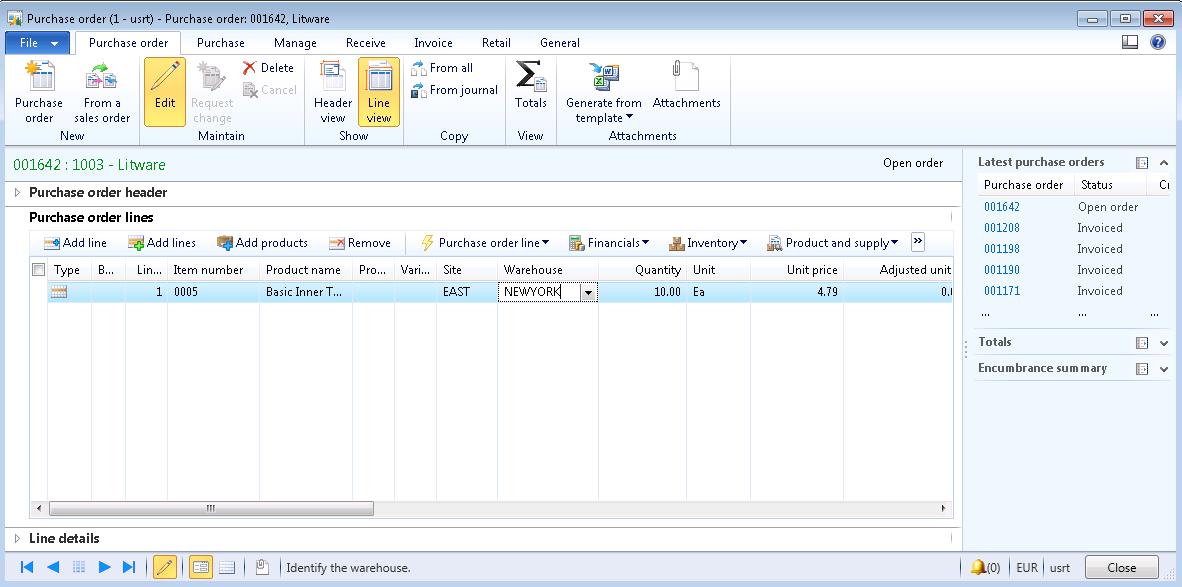
Step 2: from HQ point of view the on-hand inventory can be reviewed via the on-hand inventory in path: Inventory and warehouse management > Common > On-hand inventory.
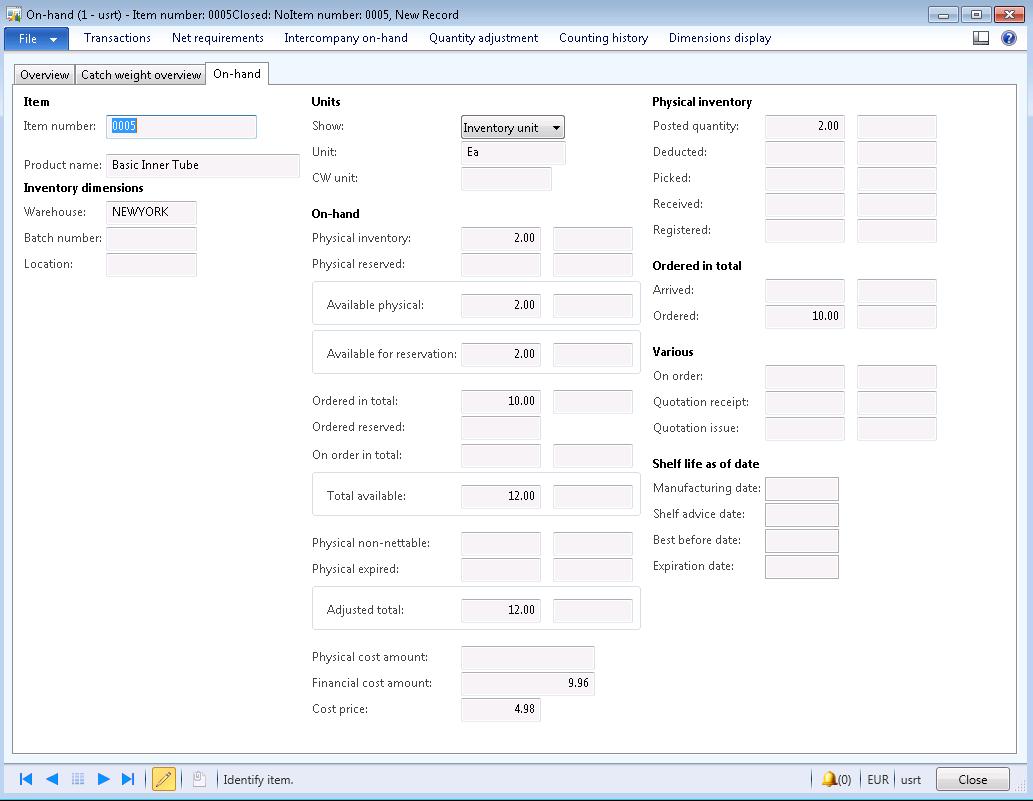
From the POS point of view the current inventory can be reviewed via the “Inventory lookup” form.

Step 3: the transaction service places the new purchase order in the New York POS.
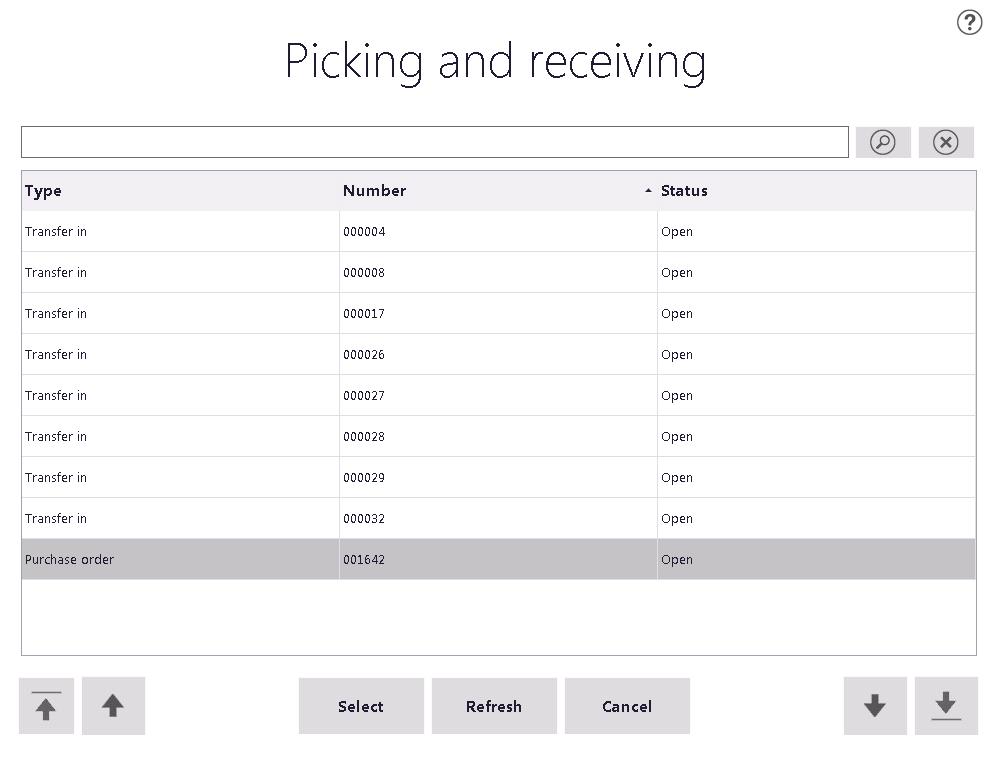
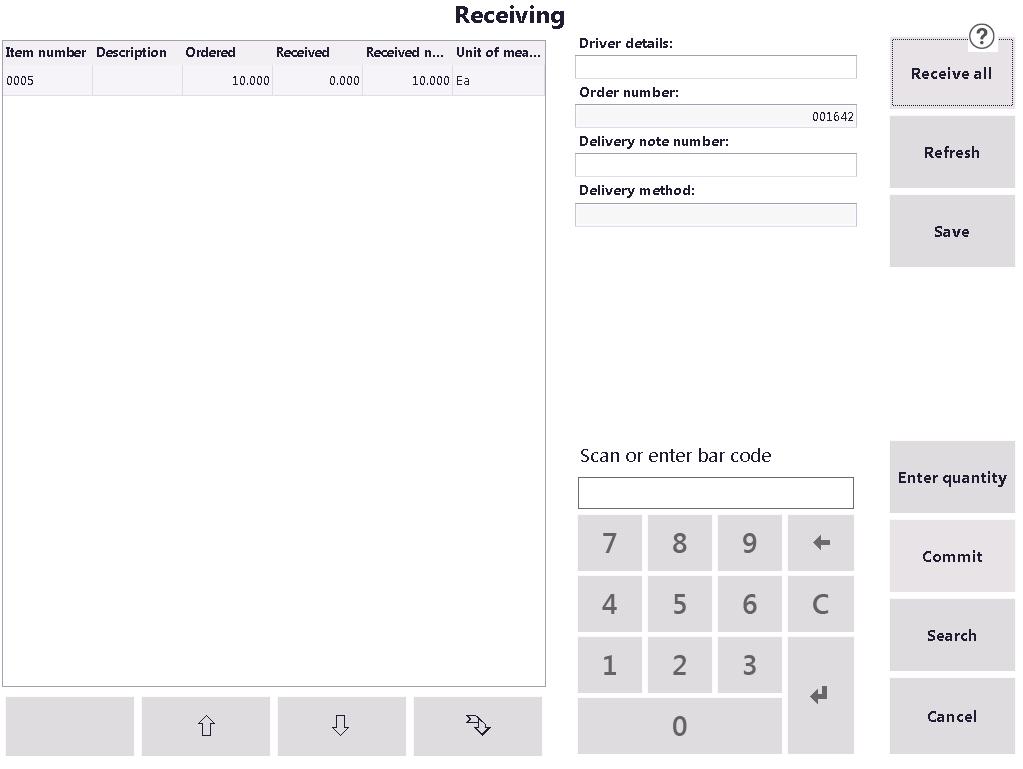
Step 4: select the purchase order and review the details. Receive the quantities via the option “Receive all” or the “Enter quantity” option and select the “Commit” button. The POS is returning the message “All lines were committed successfully”. The order is still available in the order list on the POS, with the status “Open”.
Step 5: after the commitment of the Receipt the “Receive now” purchase order line is updated with the quantities received. Review the purchase order via path: Accounts payable > Common > Purchase orders > All purchase orders.
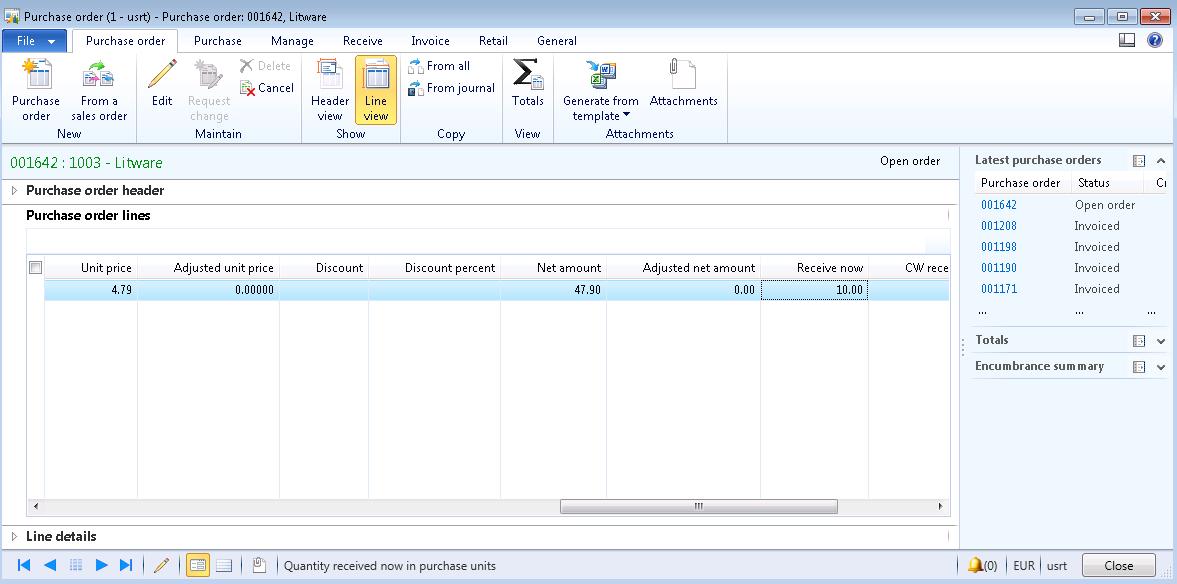
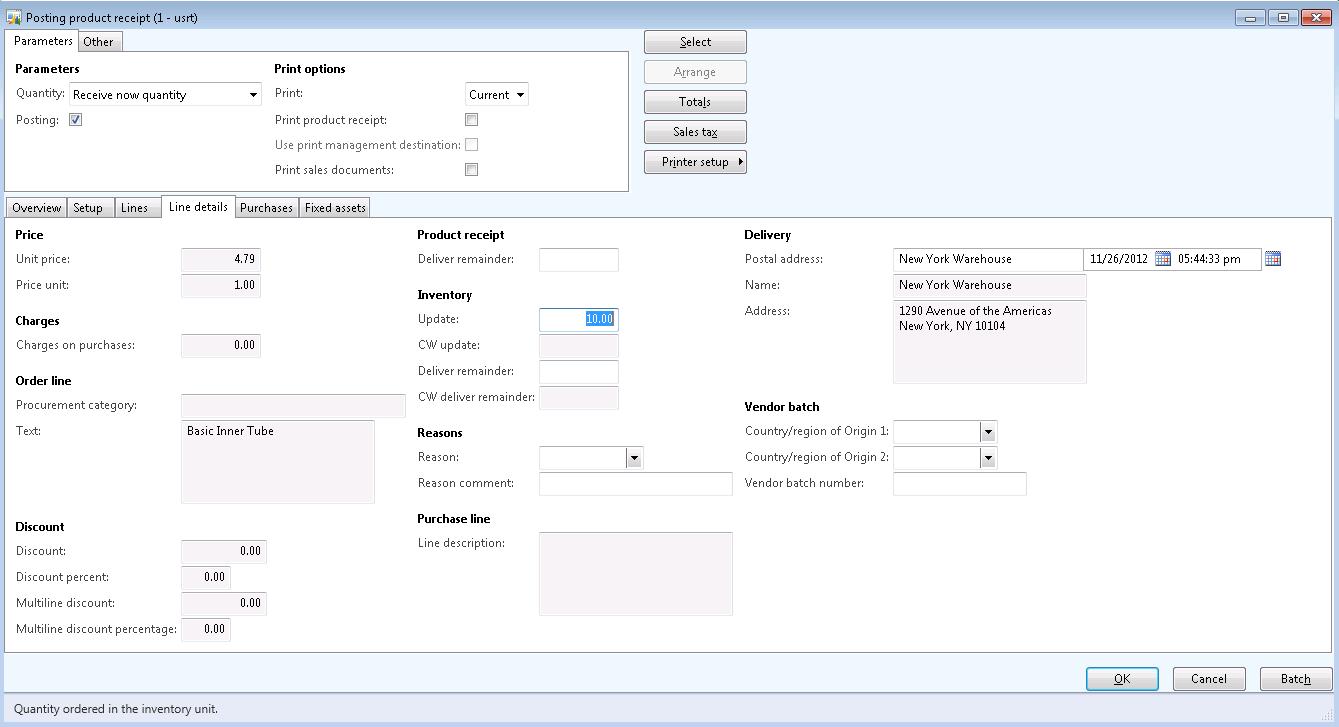
Step 6: the inventory is not updated yet. Therefore the receipt must be posted on the purchase order. Best is to select the “Receive now quantity” on the product receipt. Post the receipt. The status of the inventory transactions is changed to “Receipt status = Received”.
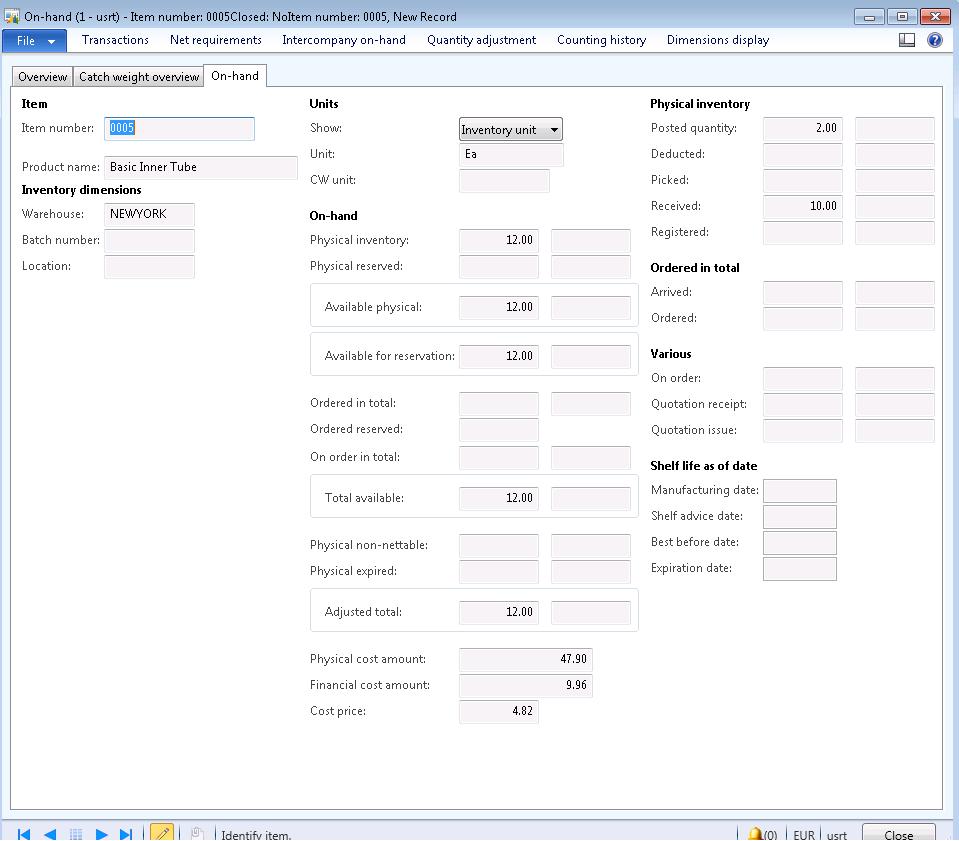
Step 7: review the inventory on hand on the Head Quarter and in the POS. Both applications will state the updated inventory quantity.

Step 8: review the status of the purchase order in the POS. You will mention that the order is no longer available for Picking and Receiving since all items are received. The order is available during partly deliveries.
Transfer order from HQ / Store to Store
A transfer order may specify that a particular store is a location that items can be shipped to.
In this case, the transfer order appears at the store as a receiving
request in Retail POS or Enterprise Portal. After the quantities that
are received at the store are entered, they can be saved locally for
additional modification. Alternatively, the quantities can be committed
and sent to the head office. At the head office, the quantities that
were received at the store are displayed in Microsoft Dynamics AX, in
the Receive now field on the transfer order.Step 1: create a transfer order for the New York store (path: Inventory and warehouse management > Periodic > Transfer orders). The inventory transaction linked to this transfer order line receives the “Receipt status = Ordered” for the Store location New York. The transfer order lines receives the “Issue status = On order” for the HQ.
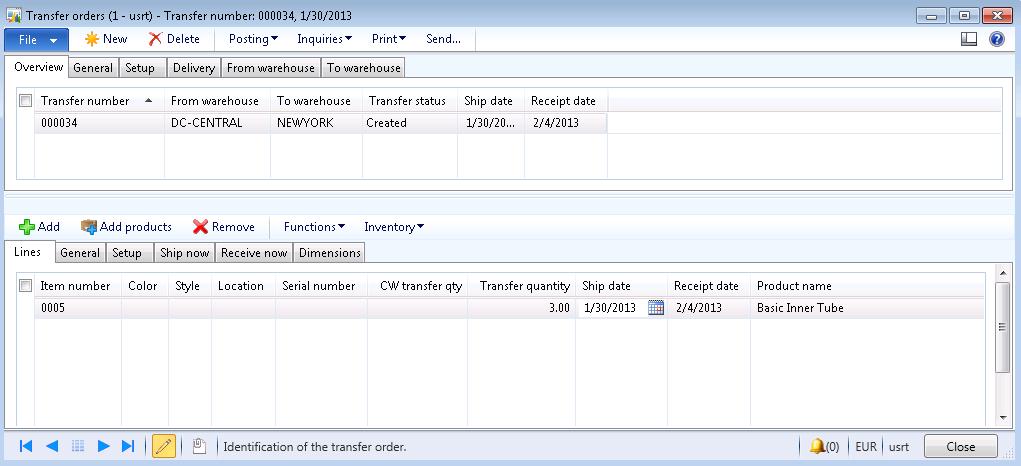

Step 2: from HQ point of view the on-hand inventory can be reviewed via the on-hand inventory in path: Inventory and warehouse management > Common > On-hand inventory. From the POS point of view the current inventory can be reviewed via the “Inventory lookup” form.
Step 3: ship the transfer order to the store. Use the posting option “Post > Ship transfer order”. Review the inventory transactions and notice that two new lines are added during transfer.
Step 4: the transaction service places the new Transfer in – order in the New York POS.
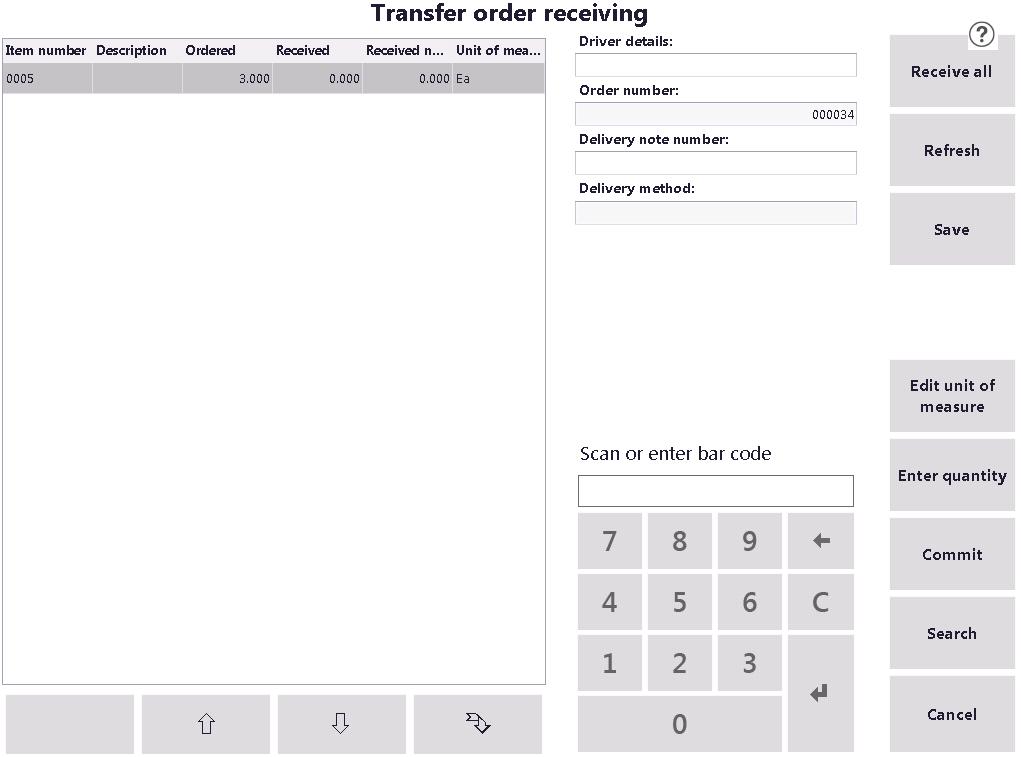
Step 5: select the Transfer order and review the details. Receive the quantities via the option ”Receive all” or the “Enter quantity” option and select the “Commit” button. The POS is returning the message “All lines were committed successfully”. The order is still available in the order list on the POS, with the status “Open”.
Step 6: after the commitment of the Receipt the “Receive now” transfer order line is updated with the quantities received. Review the transfer order via path: Inventory and warehouse management > Periodic > Transfer orders.
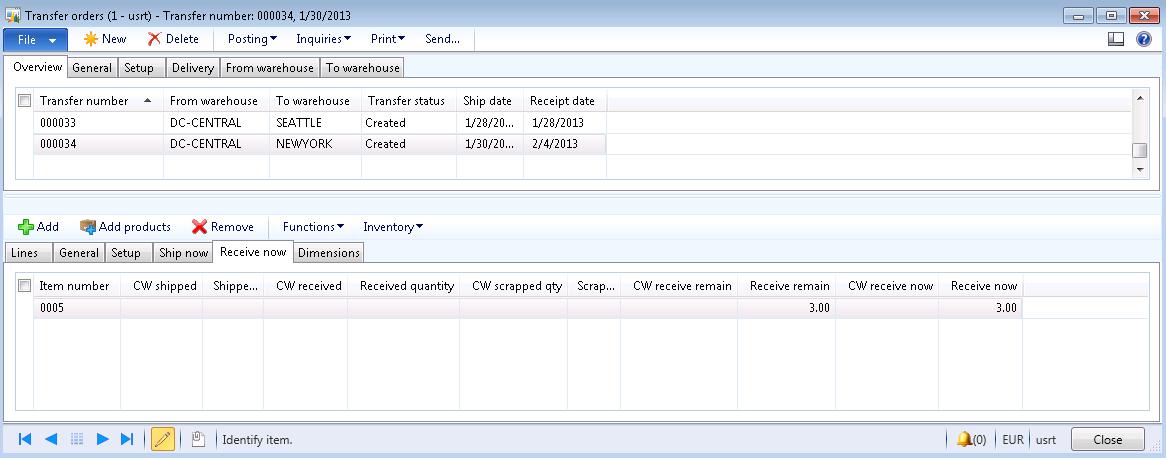
Step 7: the inventory is not updated yet. Therefore the receipt must be posted on the transfer order. Best is to select the “Receive now quantity” on the product receipt. Post the receipt. The status of the inventory transactions is changed to “Receipt status = Purchased” and “Issue status “Sold”. The status of the transfer order is set to “Received”.
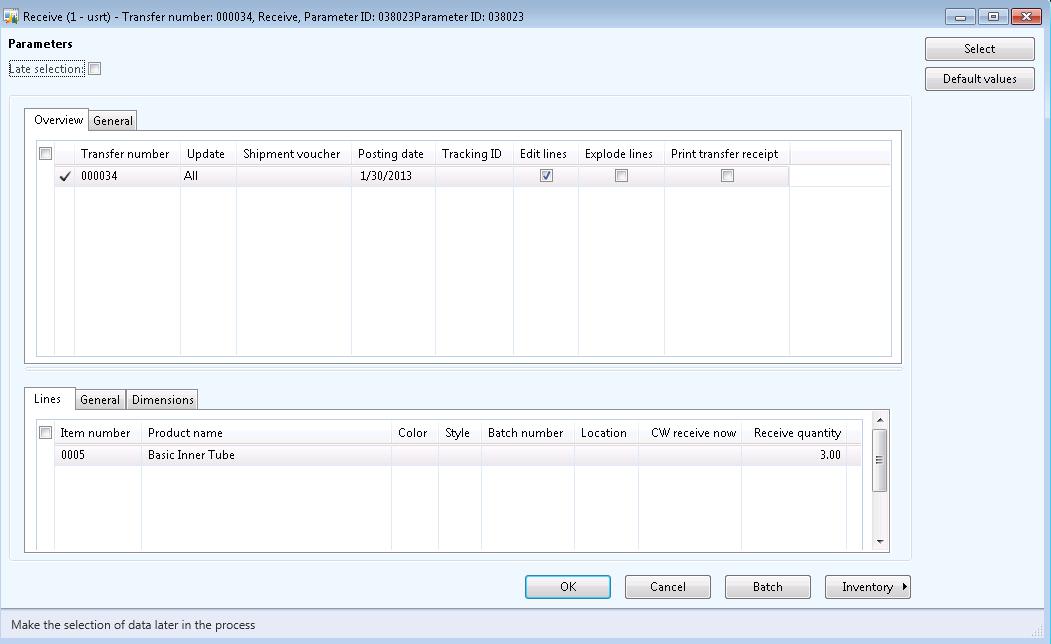

Step 8: review the inventory on hand on the Head Quarter and in the POS. Both applications will state the updated inventory quantity.
Step
9: review the status of the transfer order in the POS. You will mention
that the order is no longer available for Picking and Receiving since
all items are received. The order is available during partly deliveries.
Transfer order from Store to HQ / StoreA transfer order may specify that a particular store is a location that items can be shipped from. In this case, the transfer order appears at the store as a picking request in Retail POS or Enterprise Portal for Microsoft Dynamics AX. After the quantities that are requested are picked, they are committed and sent to the head office. At the head office, the quantities that were picked at the store are displayed in Microsoft Dynamics AX, in the Ship now field on the transfer order.
Step 1: create a transfer order from the New York store to HQ (path: Inventory and warehouse management > Periodic > Transfer orders). The inventory transaction linked to this transfer order line receives the “Receipt status = Ordered” for HQ. The transfer order lines receives the “Issue status = On order” for the Store New York.
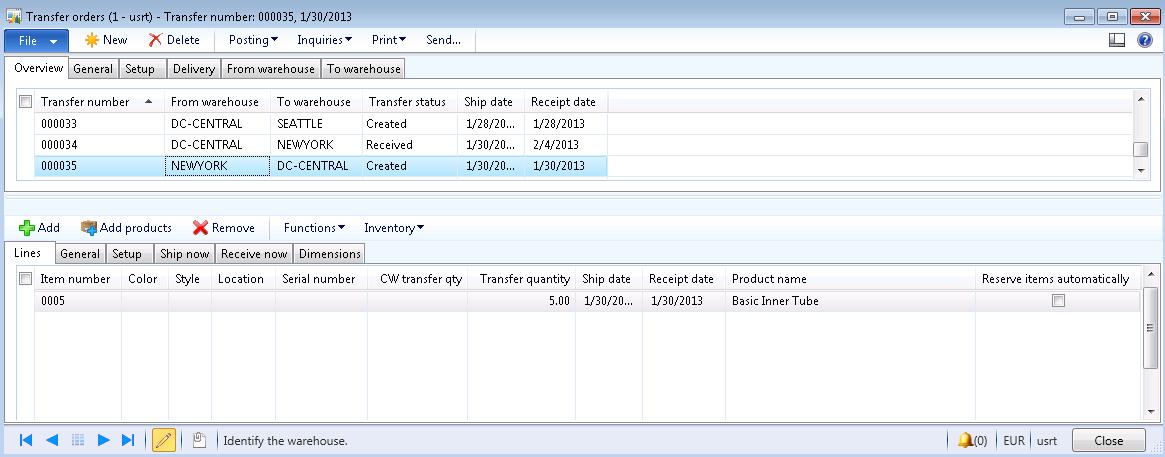

Step 2: from HQ point of view the on-hand inventory can be reviewed via the on-hand inventory in path: Inventory and warehouse management > Common > On-hand inventory. From the POS point of view the current inventory can be reviewed via the “Inventory lookup” form.
Step 3: the transaction service places the new Transfer out – order in the New York POS.
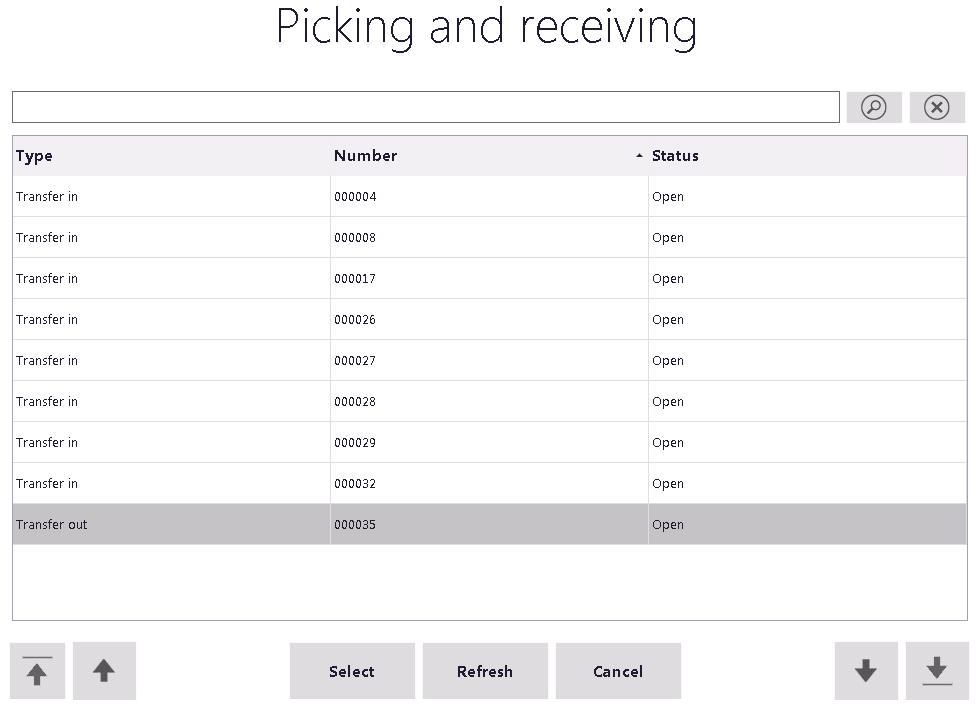
Step 4: select the Transfer order and review the details. Receive the quantities via the option ”Pick all” or the “Enter quantity” option and select the “Commit” button. The POS is returning the message “All lines were committed successfully”. The order is still available in the order list on the POS, with the status “Open”.
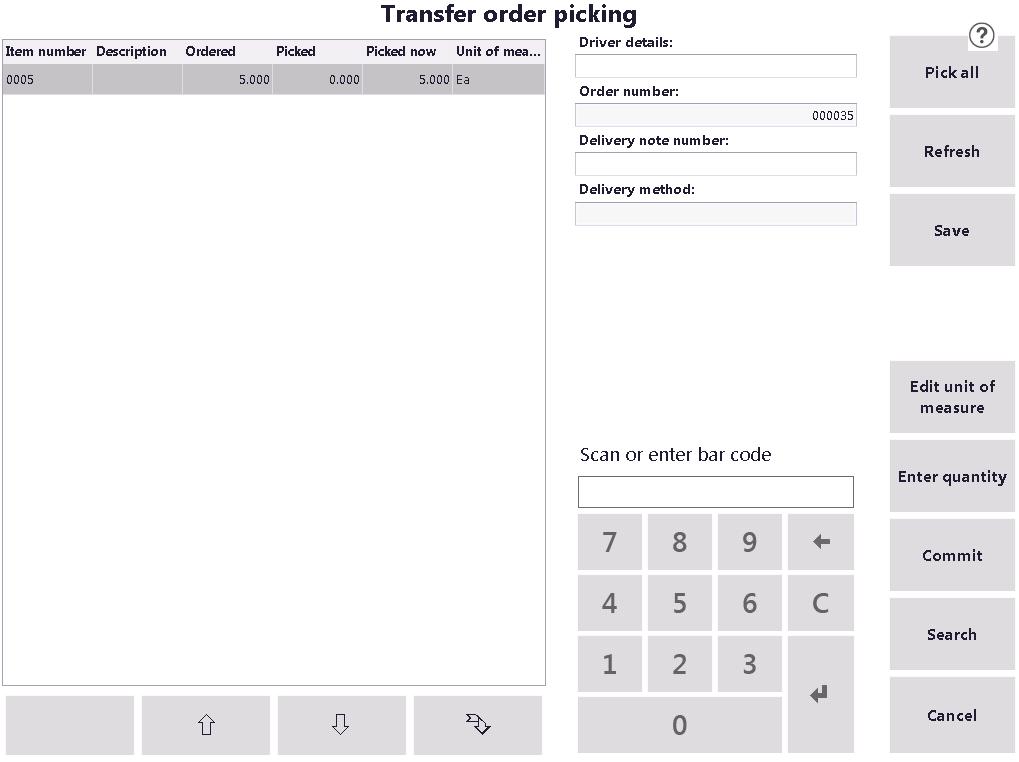
Step 6: after the commitment of the Pick the “Ship now” transfer order line is updated with the quantities picked . Review the transfer order via path: Inventory and warehouse management > Periodic > Transfer orders.
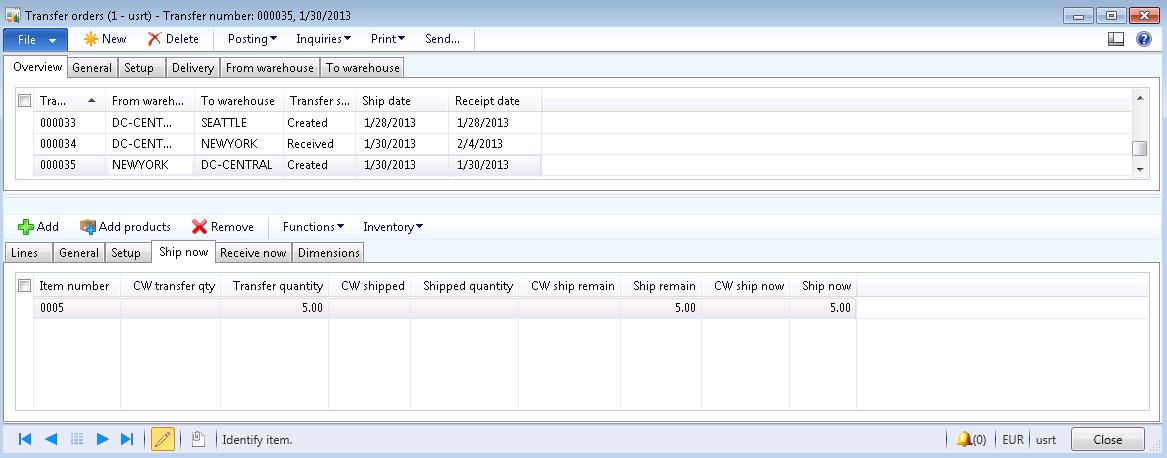
Step 7: ship the transfer order to the HQ. Use the posting option “Post > Ship transfer order”. Review the inventory transactions and notice that two new lines are added during transfer.

Step 8: the inventory is not updated yet. Therefore the receipt must be posted on the transfer order. Best is to select the “Receive now quantity” on the product receipt. Post the receipt. The status of the inventory transactions is changed to “Receipt status = Purchased” and “Issue status “Sold”.
Step 9: review the inventory on hand on the Head Quarter and in the POS. Both applications will state the updated inventory quantity.
Step
10: review the status of the transfer order in the POS. You will
mention that the order is no longer available for Picking and Receiving
since all items are received. The order is available during partly
deliveries.
Stock count (scheduled)Scheduled stock counts are initiated at the head office, which specifies the items that must be counted. The head office creates a counting document that can be received at the store, where the quantities of actual on-hand stock are entered in Retail POS or Enterprise Portal. When a stock count is completed, it is committed and sent to the head office. At the head office, the count is validated and posted.
Step 1: create a counting order for the New York store (path: Inventory and warehouse management > Journals > Item counting > Counting).

Step 2: open the stock counting journals at the New York POS.
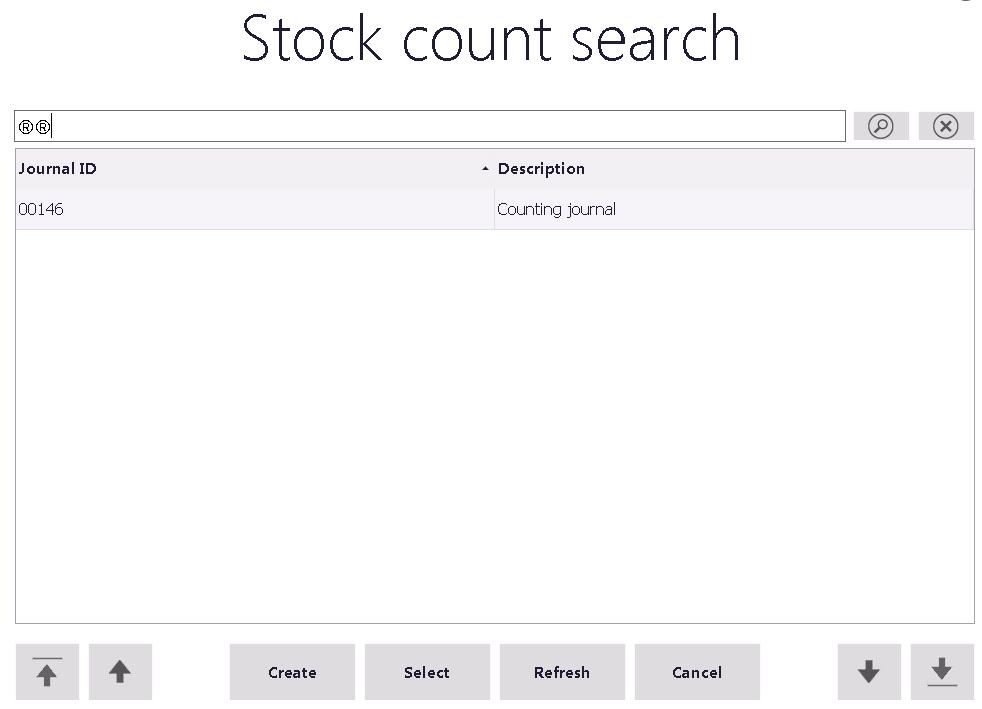
Step 3: count the items on the lines and fill in the results in the POS.
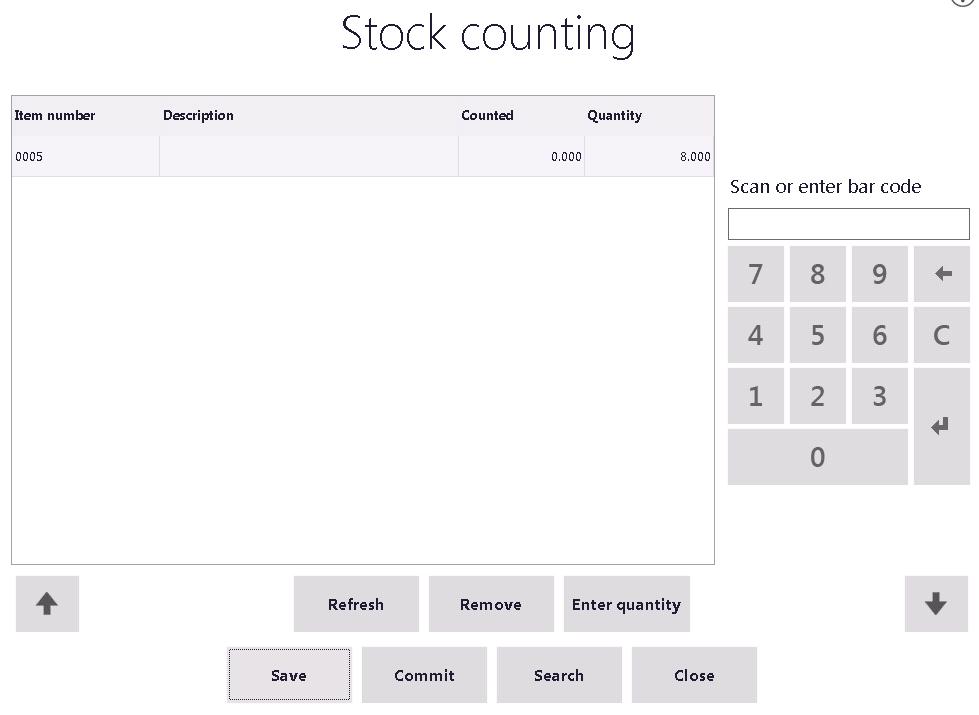
Step 4: after the commitment of the counting journal the counting journal line at the HQ is updated with the quantities counted. The status of the inventory transaction is set to “On order”.


Step 5: review the counting journal and after approval the journal can be posted. The status of the inventory transactions is changed to “Issue status = Sold”, because there is a loss of 2 pcs.

In this scenario there is a loss of 2 items. Therefore the financial voucher transaction is created.

Step 6: review the inventory on hand on the Head Quarter and in the POS. Both applications will state the updated inventory quantity.
Stock count (unscheduled)
Unscheduled stock counts are initiated at a store, and the quantities of actual on-hand stock are updated in either Retail POS or Enterprise Portal. Unlike scheduled stock counts, unscheduled stock counts do not have a predefined list of items.When a stock count of either type is completed, it is committed and sent to the head office. At the head office, the count is validated and posted. When a stock count is completed, it is committed and sent to the head office. At the head office, the count is validated and posted.
Step 1: create a counting order in the New York store. On HQ this new counting journal is created.
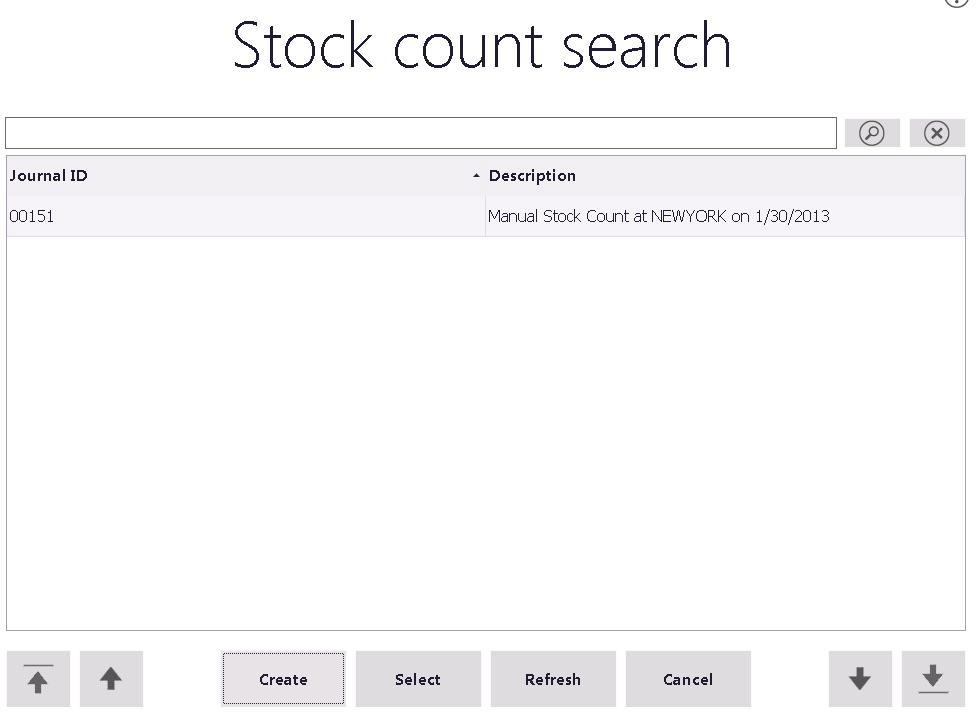
Step 2: open the stock counting journal at the New York POS.
Step 3: count the items on the lines and fill in the results in the POS.
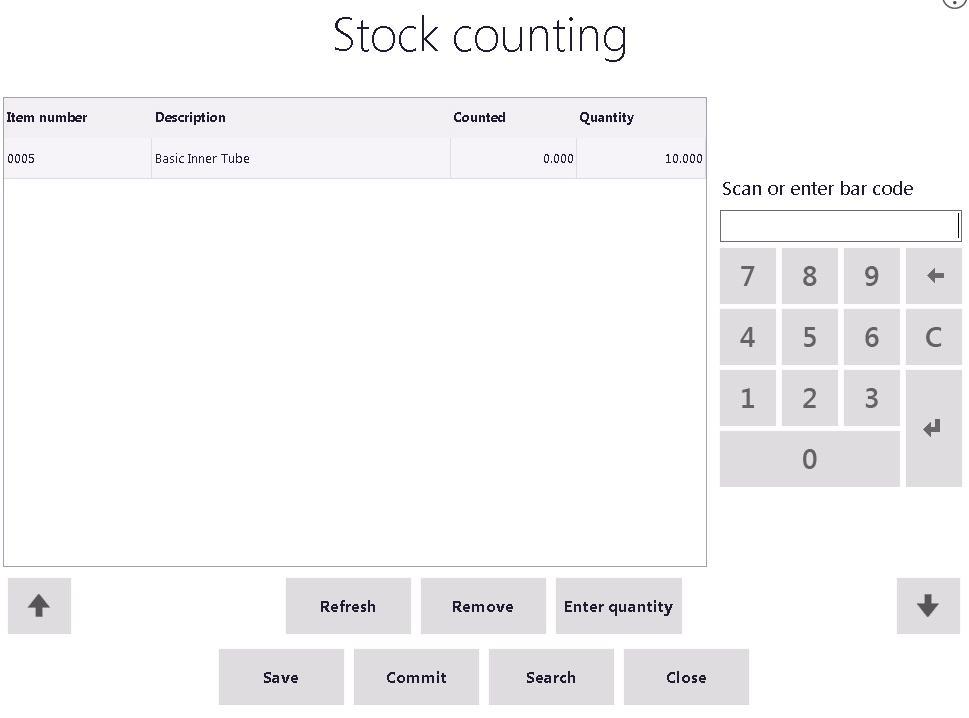
Step 4: after the commitment of the counting journal the counting journal line at the HQ is updated with the items and quantities counted. The status of the inventory transaction is set to “On order”.
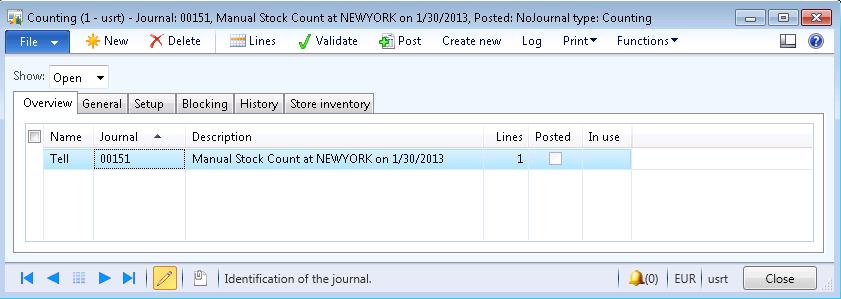

Step 5: review the counting journal and after approval the journal can be posted. The status of the inventory transactions is changed to “Receipt status = Purchased”, because there is a profit of 2 pcs.

In this scenario there is a loss of 2 items. Therefore the financial voucher transaction is created.

Step 6: review the inventory on hand on the Head Quarter and in the POS. Both applications will state the updated inventory quantity.
POS Sale from Store to HQ
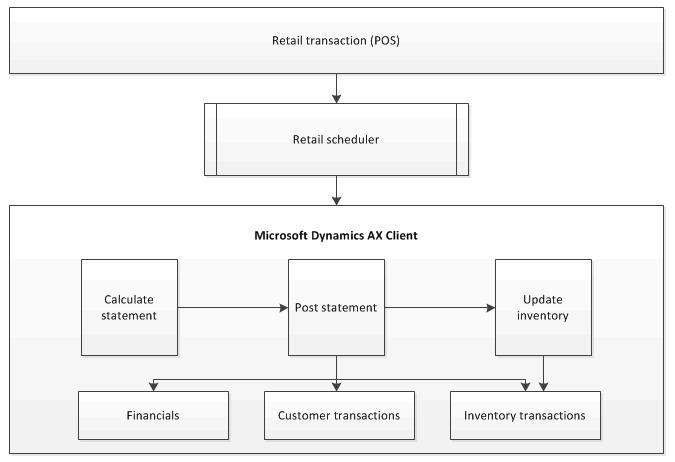
The POS transactions are posted via the Retail scheduler in the POS transactions on the HQ. Based on these transactions the statements and the inventory is updated in Dynamics AX 2012 according this flow.
Step 1: create POS transactions and pay via cash.
Step 2: execute the daily work to close the shift and the POS.
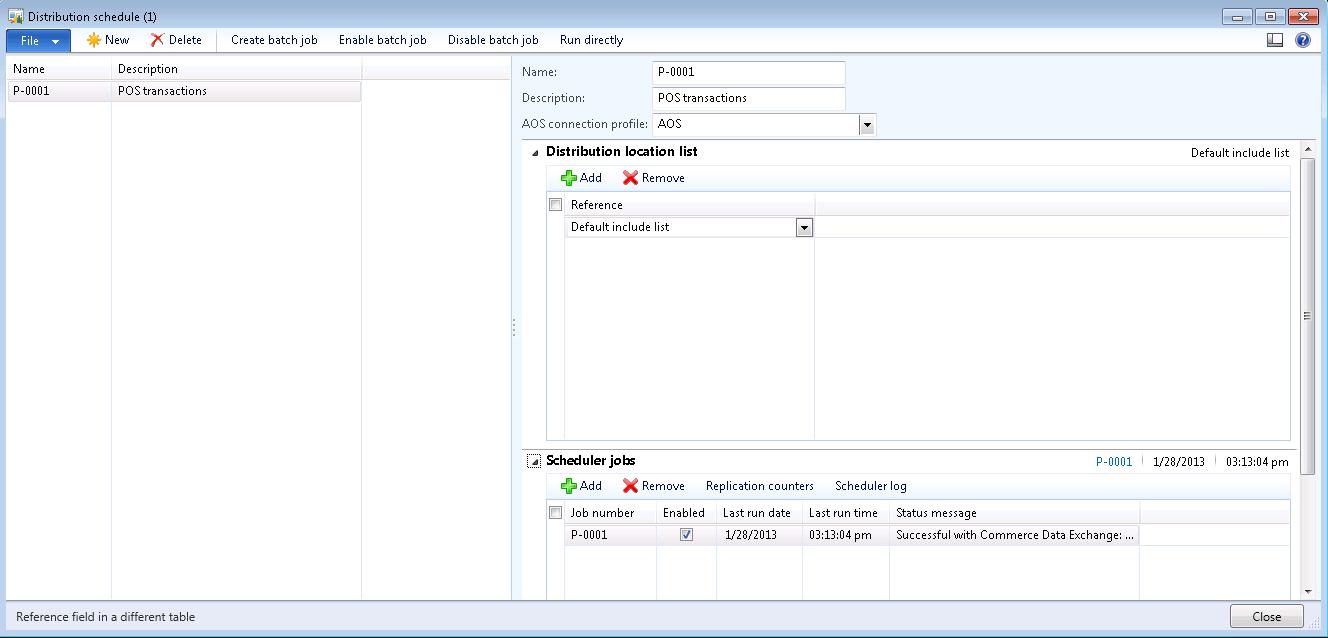
Step 3: retrieve the POS transactions in the HQ. Therefore execute the “P-0001 POS Transaction” distribution job on HQ via the option “Run directly”(path: Retail > Periodic > Data Distribution > Distribution schedule).
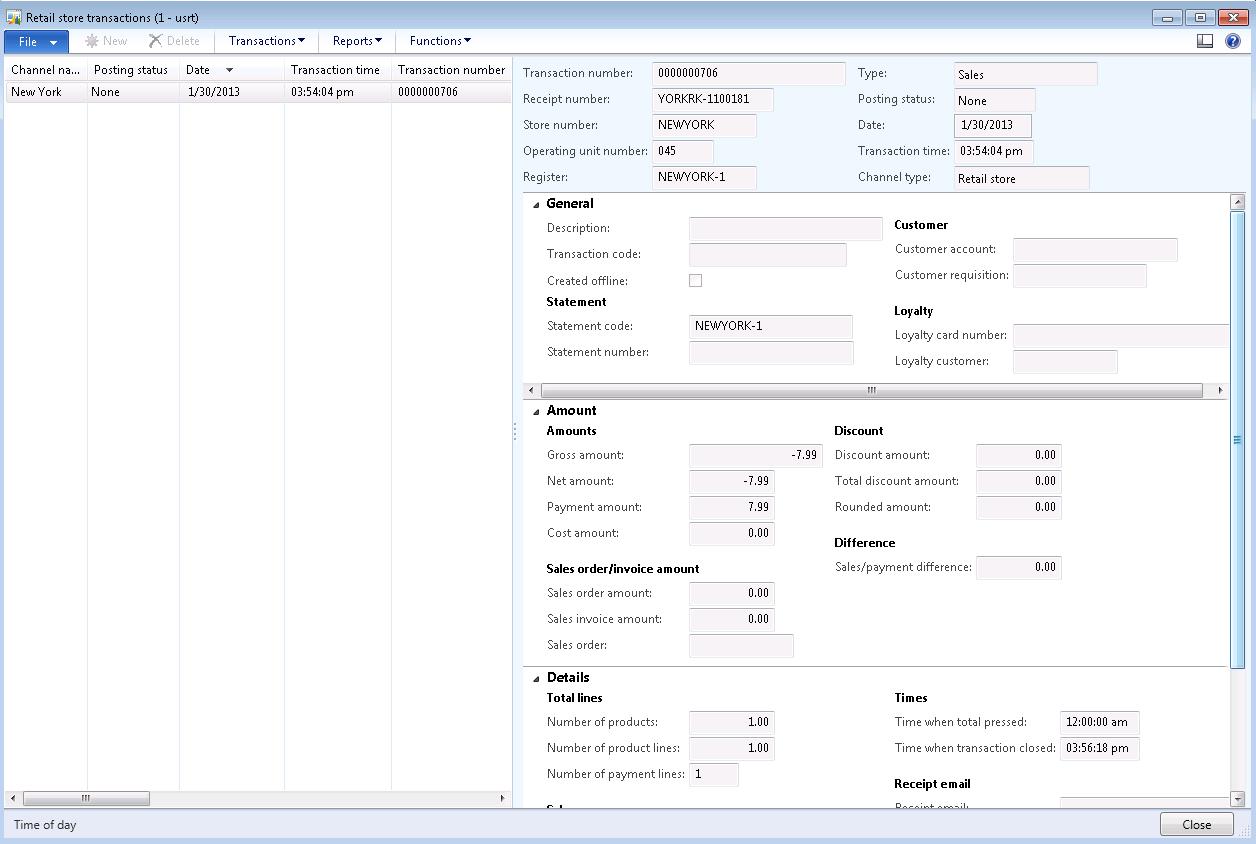
Step 4: the result is that all POS transaction for the connected stores are synchronized to Dynamics AX 2012. This can be reviewed via the option “Retail store transactions” via path: retail > Inquiries > Retail store transactions.

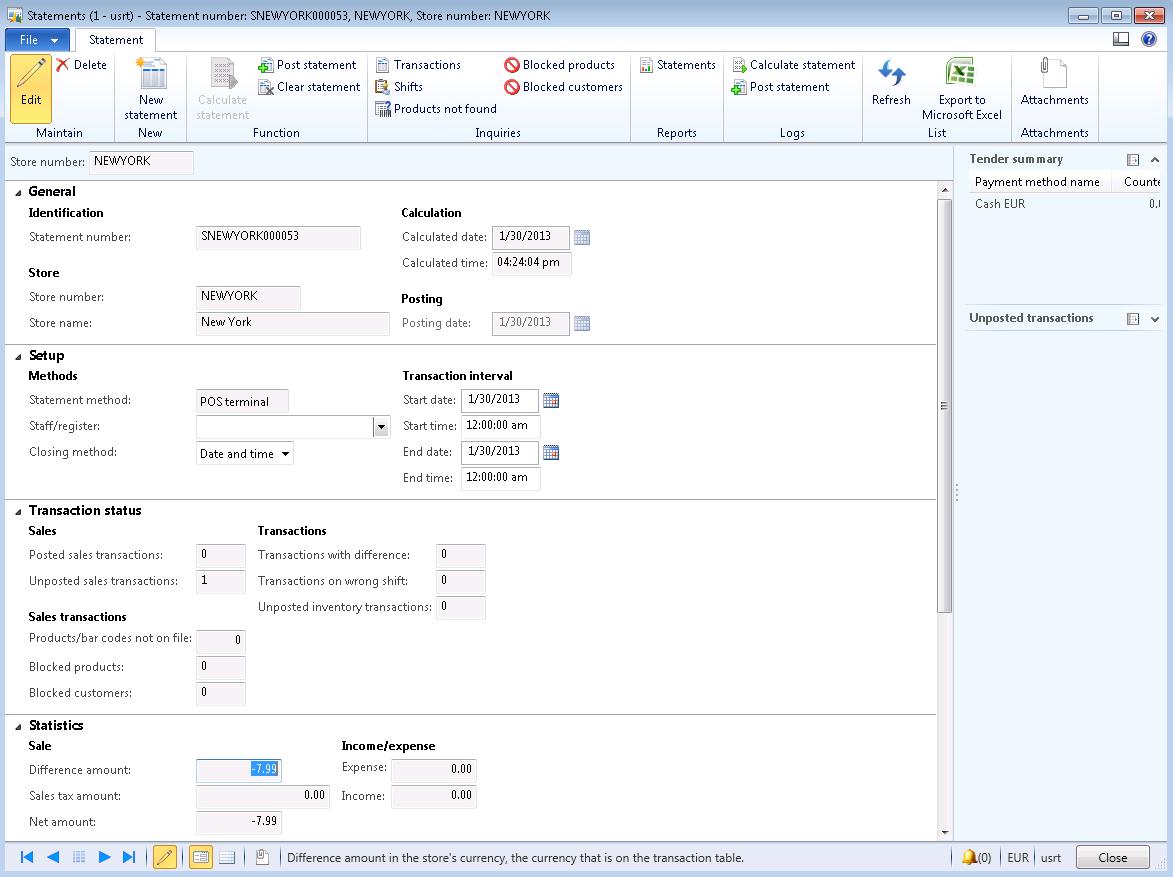
After all transactions from the registers have been uploaded from a retail store, a statement can be created, calculated, and then posted. The statement calculates the total amount of all transactions that have been created since the last store statement was created, within the statement period that you define. The statement also calculates the payment methods that are counted.
The statement is calculated by using the settings for statements and posting in the Retail parameters form and the Stores form. After the statement is created, you can review the transactions. Then, if the transactions are ready to be posted, you can post the statement. When you post the statement, the system creates accounting entries, updates customer accounts and taxes, and generates sales orders and invoices. Inventory is also updated, so that your point of sale (POS) system always has current inventory information.
Step 5: create and calculate the statement, therefore create a new statement journal and calculate the statement (path: Retail > Journals > Open statements). Post the statement after where the message “The statement was successfully posted” appears.
Step 6: the statement posting process created a sales-order with the status “Invoiced”, what means that the inventory postings are executed. In the back new sales invoices and ledger transactions are created.
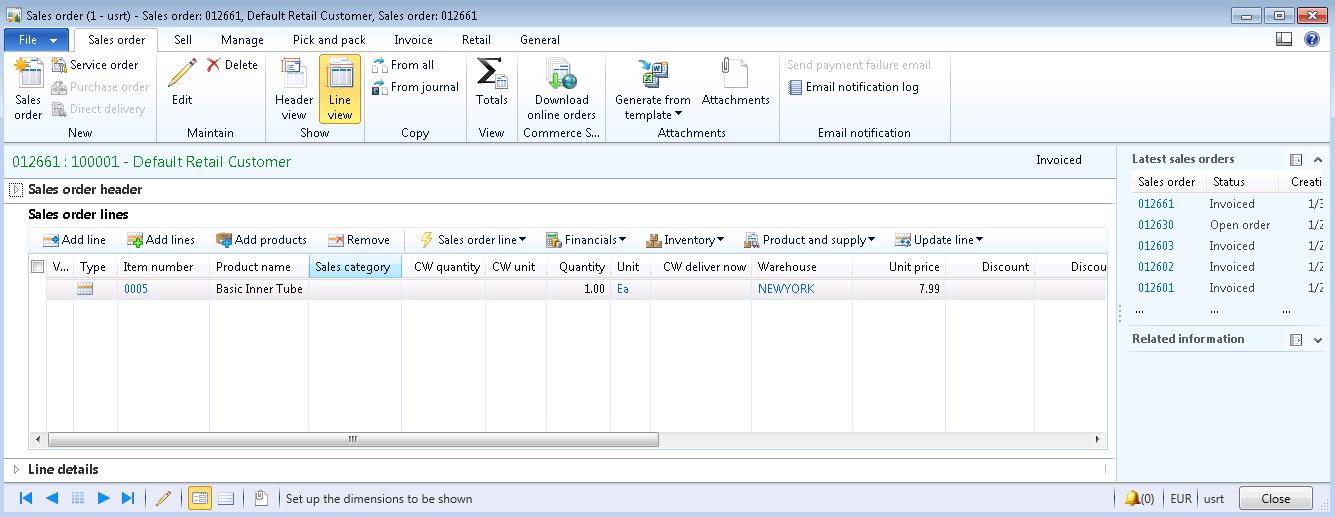

Step 7: review the inventory on hand on the Head Quarter and in the POS. Both applications will state the updated inventory quantity.
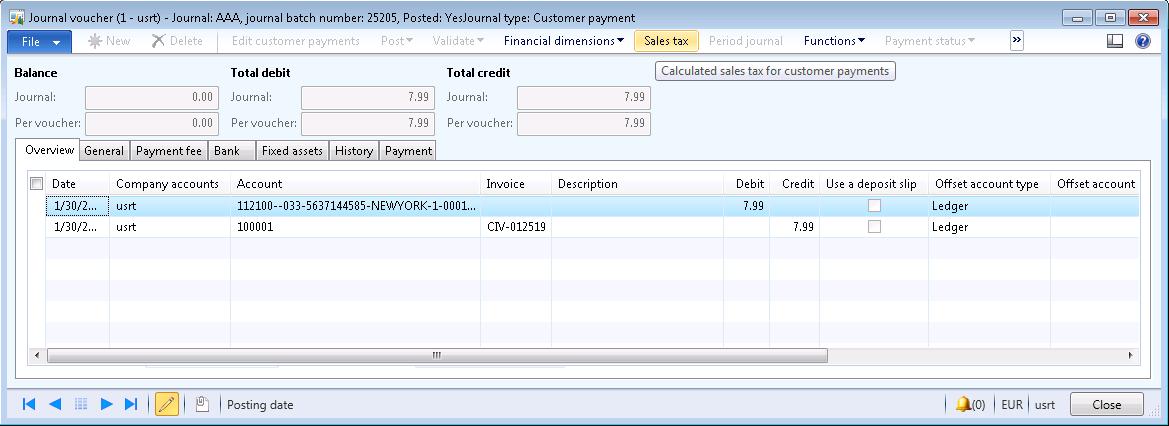
Step 8: the customer transaction created from the sales order is settled automatically via a customer payment journal. The offset account is Cash – deposit.
Batch processing POS Statements
To keep your on-hand inventory accurate, you should run this batch job frequently. For example, you can set the frequency to match the frequency with which you run the distribution schedule for job P-0001 for each store. To run the statement processes for your stores automatically, based on a schedule, configure the batch process for each stage of the statement process:
Unscheduled stock counts are initiated at a store, and the quantities of actual on-hand stock are updated in either Retail POS or Enterprise Portal. Unlike scheduled stock counts, unscheduled stock counts do not have a predefined list of items.When a stock count of either type is completed, it is committed and sent to the head office. At the head office, the count is validated and posted. When a stock count is completed, it is committed and sent to the head office. At the head office, the count is validated and posted.
Step 1: create a counting order in the New York store. On HQ this new counting journal is created.

Step 2: open the stock counting journal at the New York POS.
Step 3: count the items on the lines and fill in the results in the POS.

Step 4: after the commitment of the counting journal the counting journal line at the HQ is updated with the items and quantities counted. The status of the inventory transaction is set to “On order”.


Step 5: review the counting journal and after approval the journal can be posted. The status of the inventory transactions is changed to “Receipt status = Purchased”, because there is a profit of 2 pcs.

In this scenario there is a loss of 2 items. Therefore the financial voucher transaction is created.

Step 6: review the inventory on hand on the Head Quarter and in the POS. Both applications will state the updated inventory quantity.
POS Sale from Store to HQ
The POS transactions are posted via the Retail scheduler in the POS transactions on the HQ. Based on these transactions the statements and the inventory is updated in Dynamics AX 2012 according this flow.

Step 1: create POS transactions and pay via cash.
Step 2: execute the daily work to close the shift and the POS.
Step 3: retrieve the POS transactions in the HQ. Therefore execute the “P-0001 POS Transaction” distribution job on HQ via the option “Run directly”(path: Retail > Periodic > Data Distribution > Distribution schedule).

Step 4: the result is that all POS transaction for the connected stores are synchronized to Dynamics AX 2012. This can be reviewed via the option “Retail store transactions” via path: retail > Inquiries > Retail store transactions.


After all transactions from the registers have been uploaded from a retail store, a statement can be created, calculated, and then posted. The statement calculates the total amount of all transactions that have been created since the last store statement was created, within the statement period that you define. The statement also calculates the payment methods that are counted.
The statement is calculated by using the settings for statements and posting in the Retail parameters form and the Stores form. After the statement is created, you can review the transactions. Then, if the transactions are ready to be posted, you can post the statement. When you post the statement, the system creates accounting entries, updates customer accounts and taxes, and generates sales orders and invoices. Inventory is also updated, so that your point of sale (POS) system always has current inventory information.
Step 5: create and calculate the statement, therefore create a new statement journal and calculate the statement (path: Retail > Journals > Open statements). Post the statement after where the message “The statement was successfully posted” appears.

Step 6: the statement posting process created a sales-order with the status “Invoiced”, what means that the inventory postings are executed. In the back new sales invoices and ledger transactions are created.


Step 7: review the inventory on hand on the Head Quarter and in the POS. Both applications will state the updated inventory quantity.
Step 8: the customer transaction created from the sales order is settled automatically via a customer payment journal. The offset account is Cash – deposit.

Batch processing POS Statements
To keep your on-hand inventory accurate, you should run this batch job frequently. For example, you can set the frequency to match the frequency with which you run the distribution schedule for job P-0001 for each store. To run the statement processes for your stores automatically, based on a schedule, configure the batch process for each stage of the statement process:
- Configure the distribution schedule to retrieve schedule “P-0001 POS Transactions”.
- Configure the calculate statement process to calculate the transaction sets for one store or all stores.
- Configure the post statement process to post the calculated statements.
- Configure the post inventory process to update the inventory for the stores when the statements are posted.
- Configure the batch processing of the received transfer orders
- Configure the batch processing of the shipped transfer orders
- Configure the batch processing of the received purchase orders
- Configure the batch processing of the sipped (return) purchase orders