- Sales transactions
- Payment transactions
- Income and Expense transactions
- Reason code transactions
- Tender declaration transactions
- Banked ledger transactions
- Safe tender transactions
- Loyalty point transactions
- Order and invoice transactions
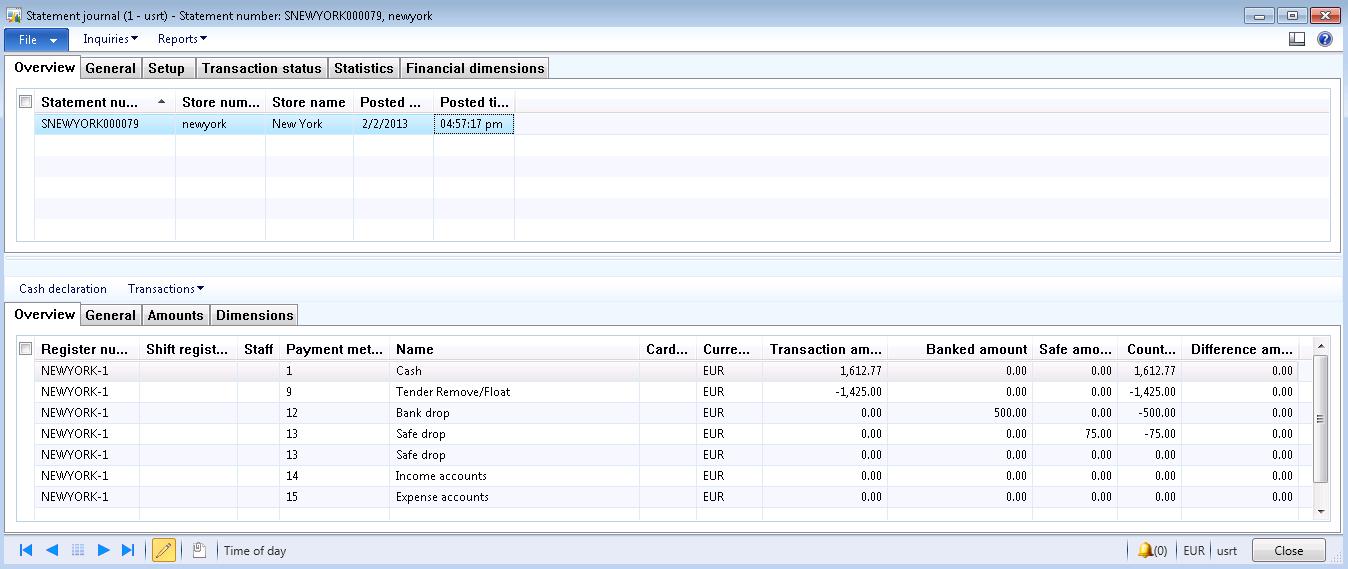
The created statement journal (example):
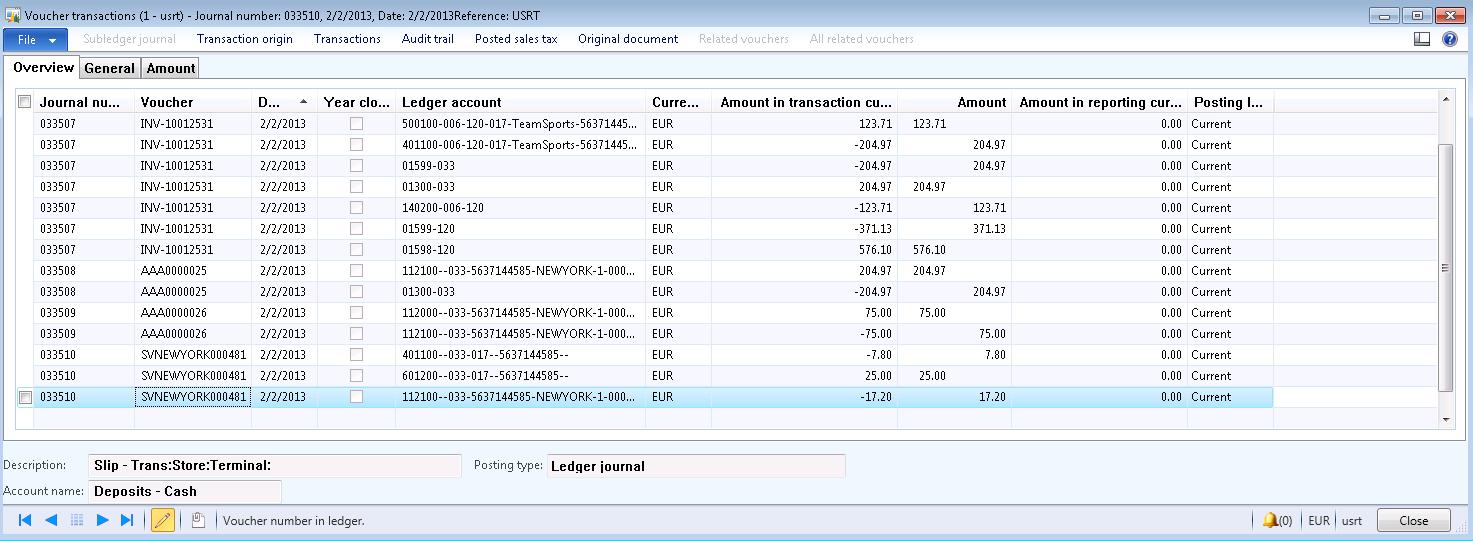
The ledger transactions (example):
After posting the statements all transactions are processed into several procedures in Dynamics AX 2012. This blog explains some scenario’s mentioned above about the daily drawer and shift operations in the Dynamics AX 2012 R2 POS in relation to the statement postings in the Retail Headquarter (HQ) environment. The examples are used from the Dynamics AX R2 VM (drop 1). The procedures are explained with the usage of the following activities:
- Create shift
- Declare starting amount
- Float entry
- Tender removal
- Income / expense accounts
- Safe drop
- Bank drop
- Tender declaration
- Suspend and resume shift
- Blind close
- Close shift
- Print x/z: shift reports
When starting a new day it is advised to create a new swift, what means that the previous shift is closed. A shift records all drawer procedures during the day and holds the daily totals. A shift is the record of one register’s activity from the close of the previous shift to the close of the current shift. A shift typically includes the opening amount, the sales transactions, and the closing amount.
Often, each cashier works at only one register. In this case, the cashier opens a shift at the start of the day or work shift and closing the shift at the end. However, cashiers can also log on to and log off from multiple registers during the day. In this case, consider the following points about shifts:
- If a cashier logs on to two registers, the cashier logs on to two shifts.
- Multiple cashiers who share the same register share the same shift.
- When one cashier logs off, and another cashier logs on, a new shift is not created. You can close one shift and open a new shift only by performing a close shift operation.
- When a cashier moves, together with his or her till, to work at more than one register the till is “Floating”. The cashier suspends the current shift on the first register, and then resumes the shift on the second register.
Step 2: retrieve the POS transactions, a store transaction is created for the type “Logon”.
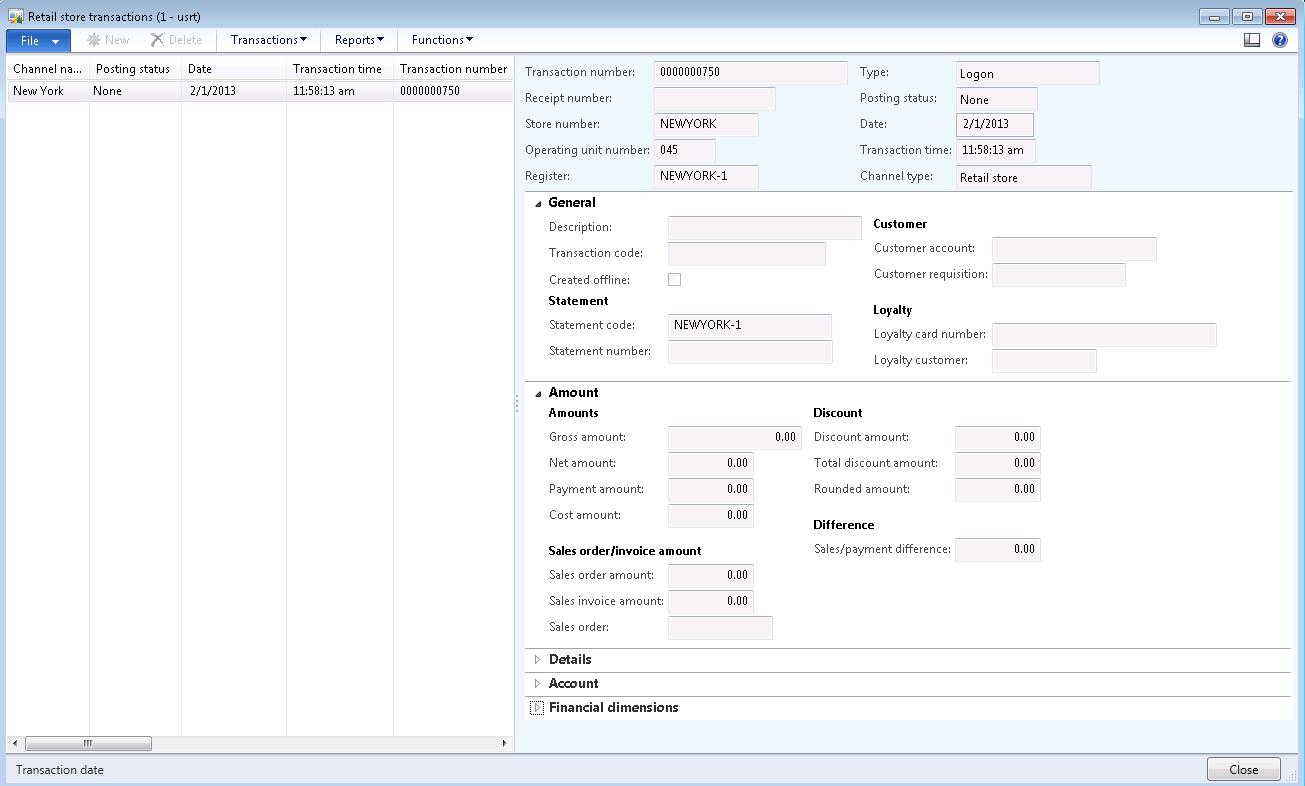
Step 3: create and post the statement. No further transactions are created in Dynamic AX 2012.
Declare starting amount
Declare the amount that is in the cash drawer when the day or shift starts.
Step 1: select the drawer option “Declare starting amount”.
Step 2: declare the starting amount in POS currency and press ok.
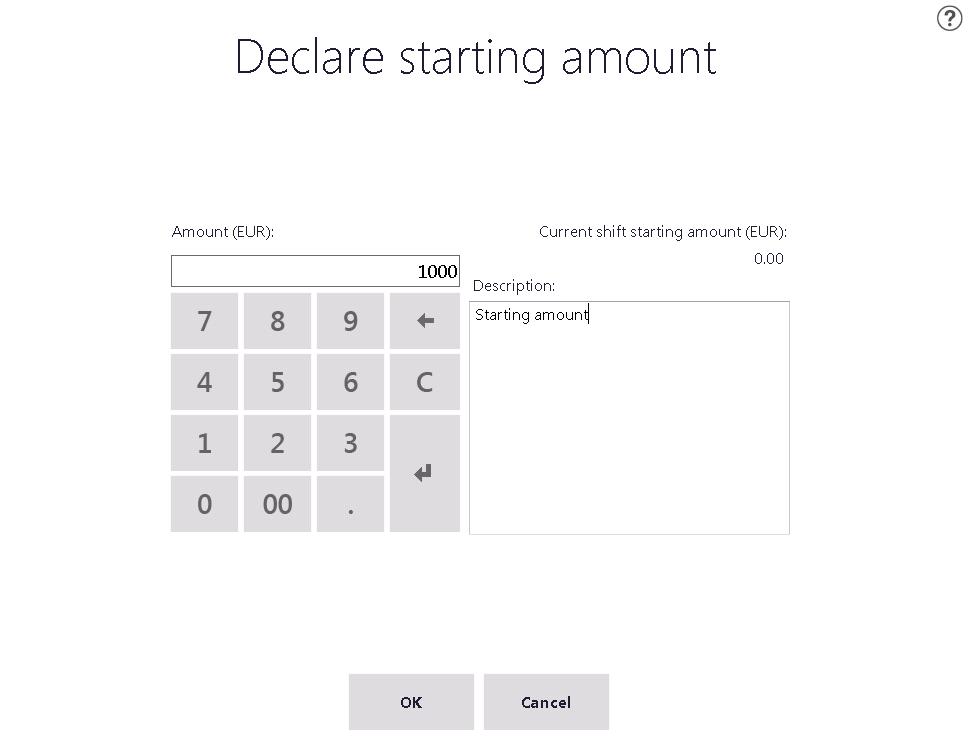
Step 3: retrieve the POS transactions, a store transaction is created for the type “Starting amount”. The starting Amount Receipt is printed.

Step 4: open the linked payment transactions and you will notice that two transaction lines are created. One positive amount with the payment method 1 (Cash, operation name “Pay cash”) and one negative amount with payment method 9 (Tender Remove / Float, operation name “”).
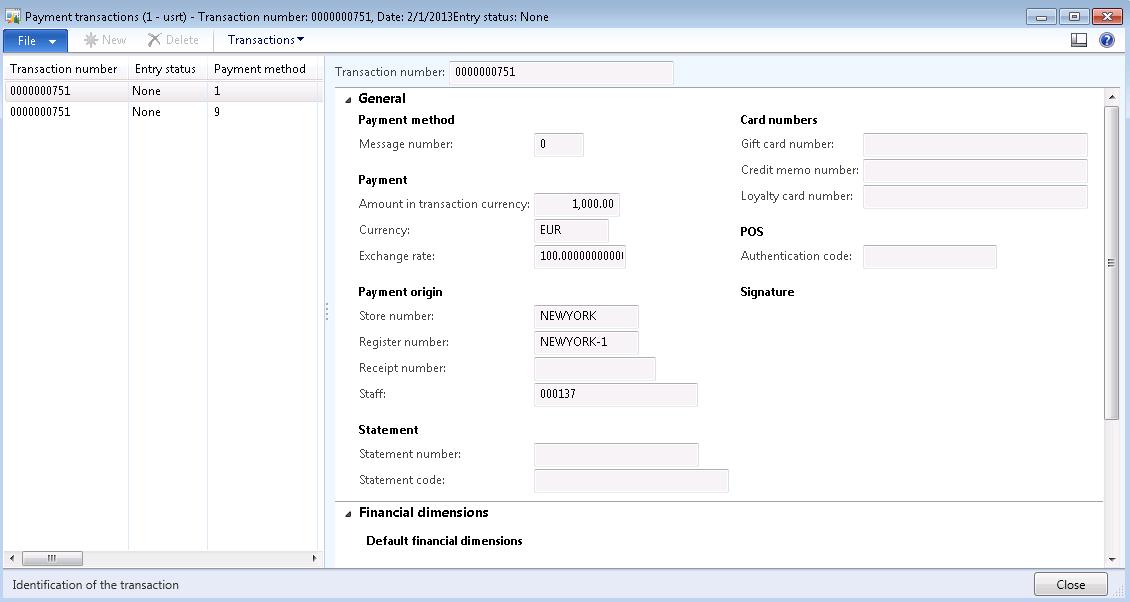
Step 5: create and post the statement.
Step 6: review the posted statement. You will mention that the amount added to the drawer is posted.
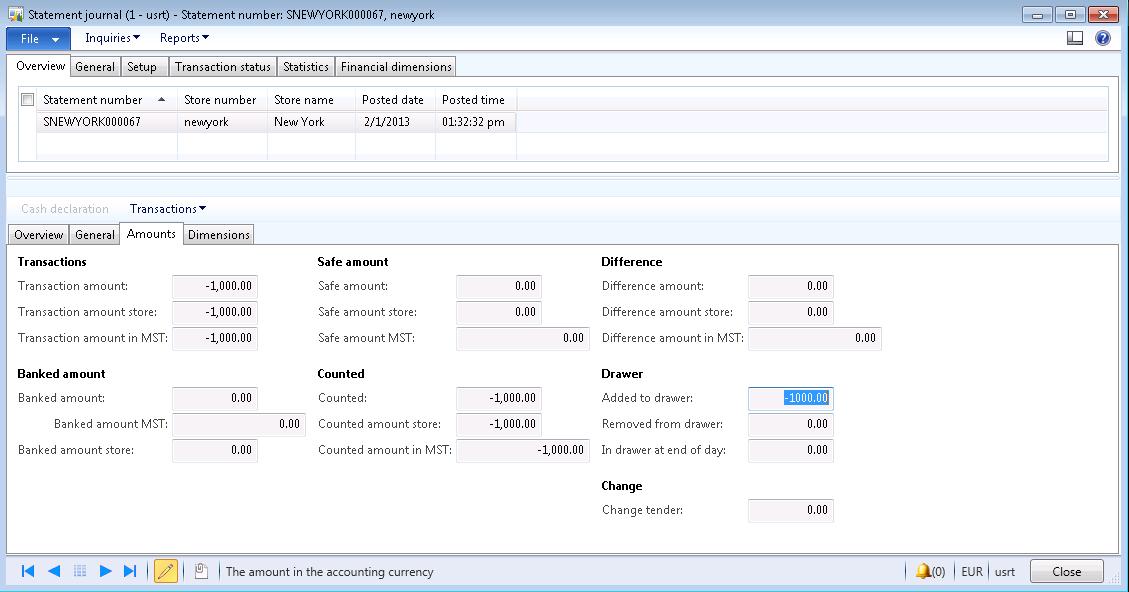
Step 7: review the ledger transactions. You will notice that no ledger transactions are created.
Float entry
Register a float entry to the cash drawer, such as an addition or a change.
Step 1: select the drawer option “Float entry”.
Step 2: declare the amount in POS currency and press ok. The Float Entry Receipt is printed.
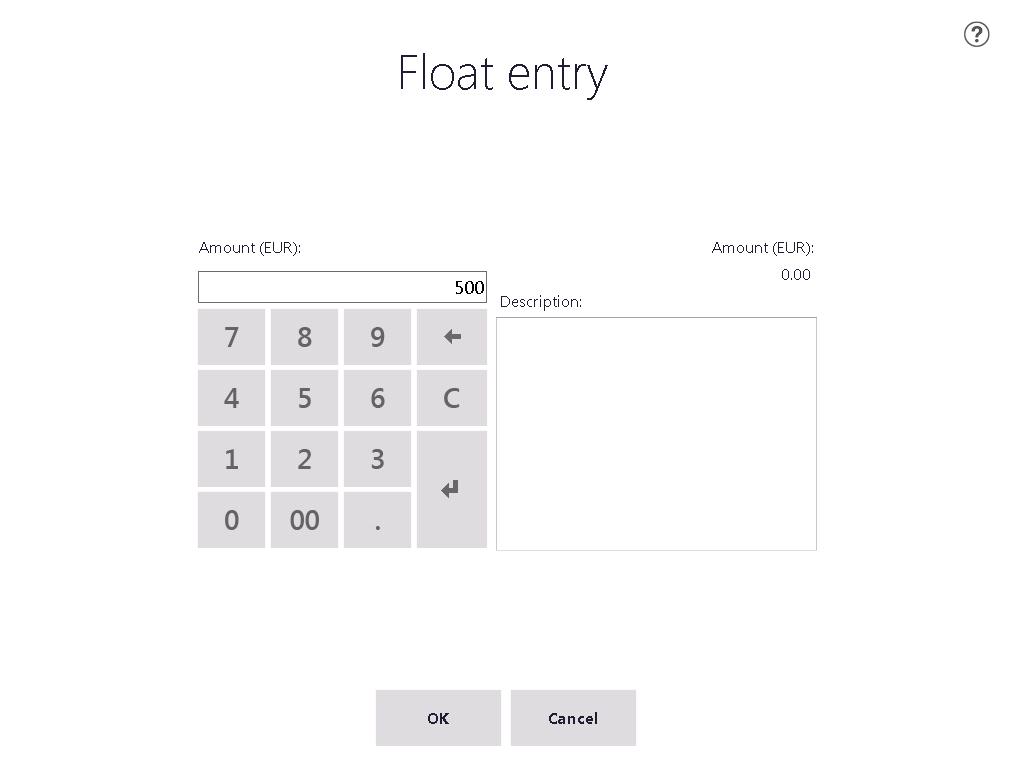

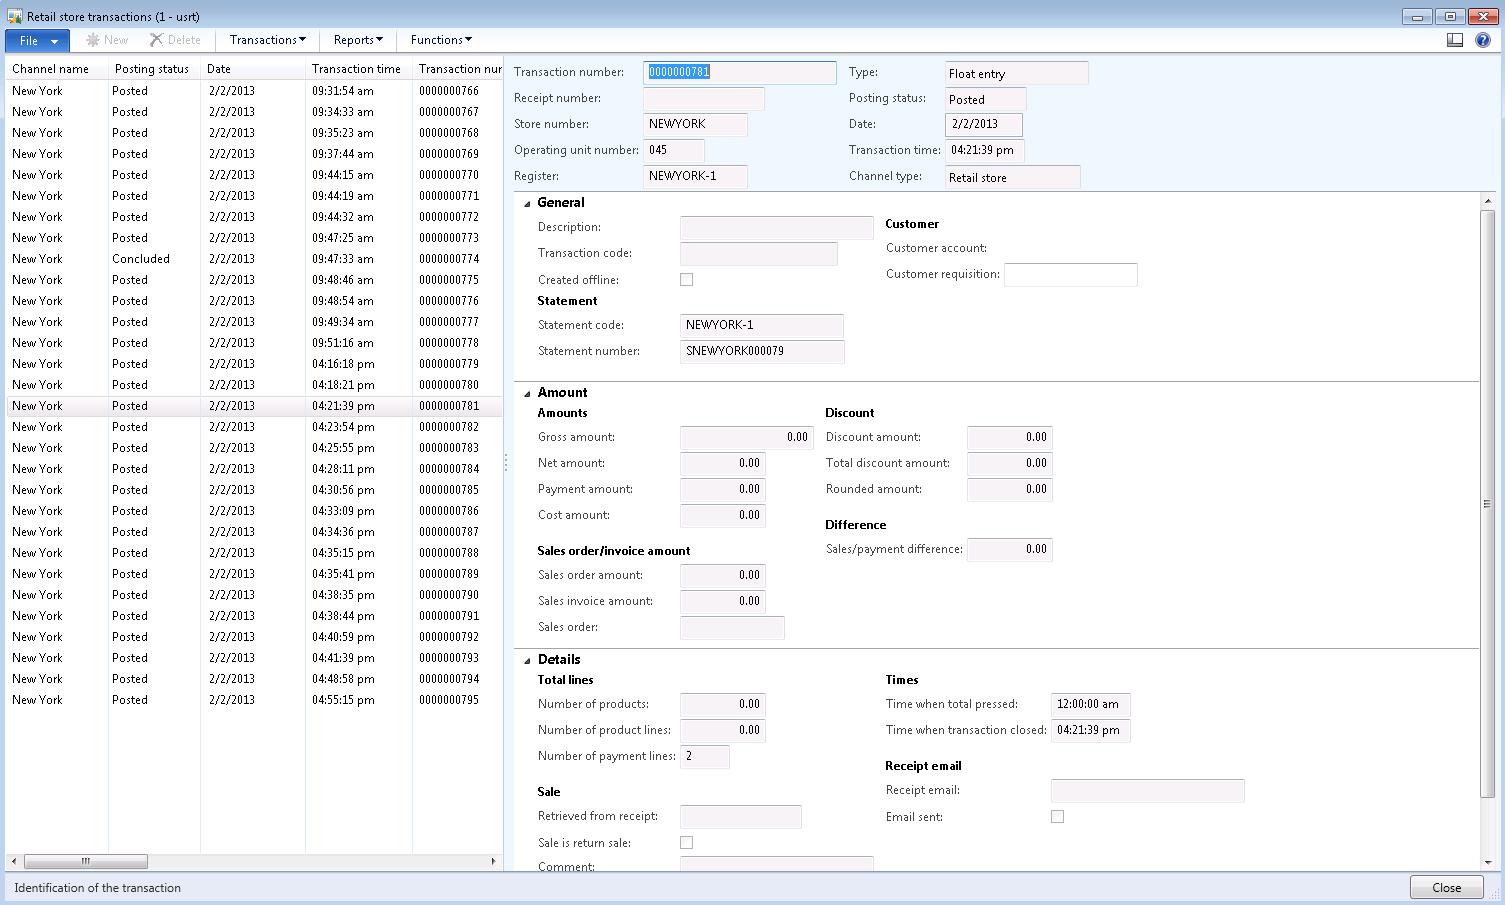
Step 3: retrieve the POS transactions, a store transaction is created for the type “Float entry”.Step 2: declare the amount in POS currency and press ok. The Float Entry Receipt is printed.


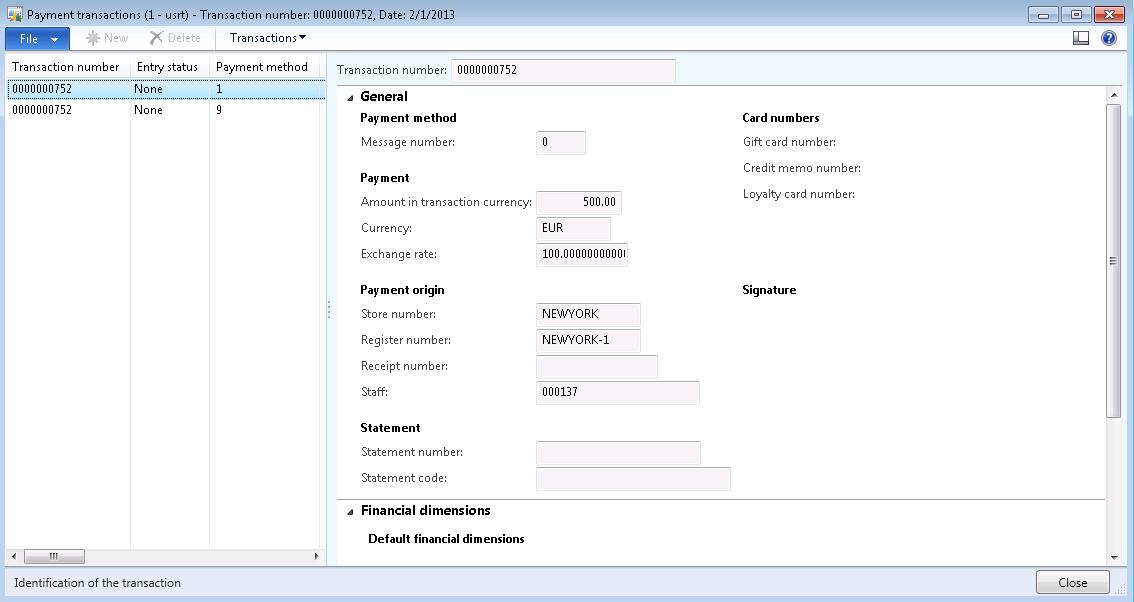
Step 4: open the linked payment transactions and you will notice that two transaction lines are created. One positive amount with the payment method 1 (Cash, operation name “Pay cash”) and one negative amount with payment method 9 (Tender Remove / Float, operation name “”).
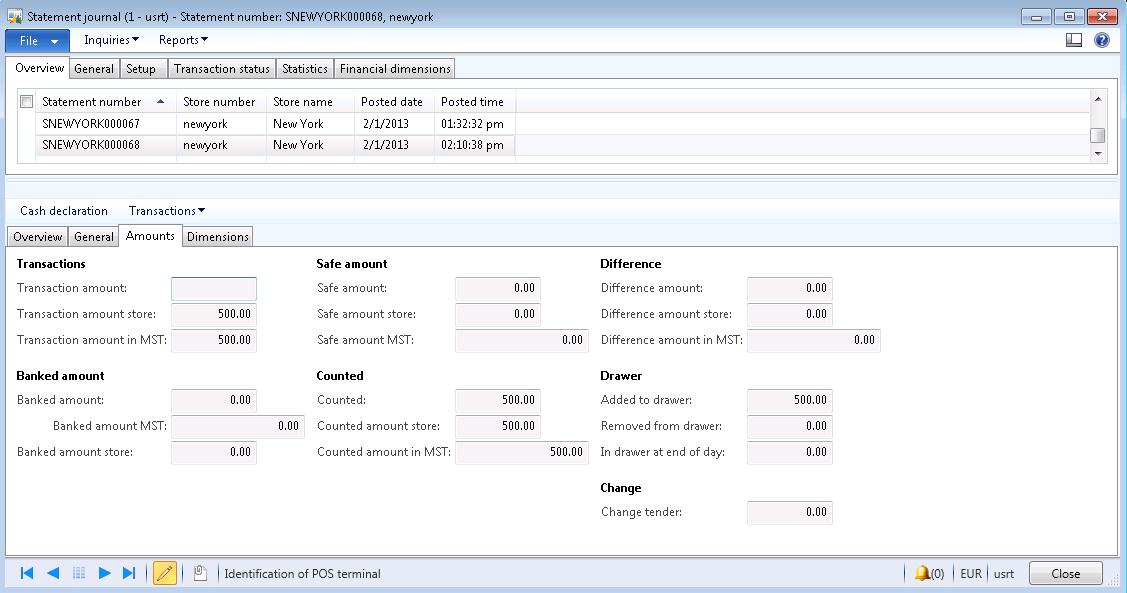
Step 5: create and post the statement.
Step 6: review the posted statement. You will mention that the amount added to the drawer is posted.
Step 7: review the ledger transactions. You will notice that no ledger transactions are created.
This should be part of future improvements.
Tender removal
Record the removal of money from the cash drawer.
Step 1: select the drawer option “Tender removal”.
Step 2: declare the amount in POS currency and press ok. The Removal Receipt is printed.
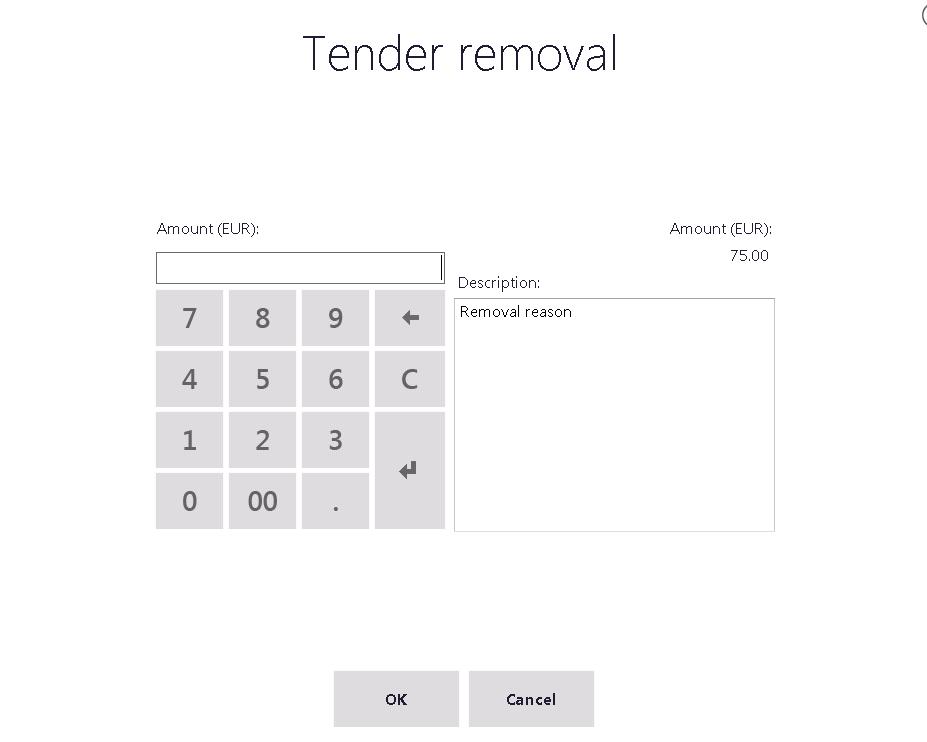
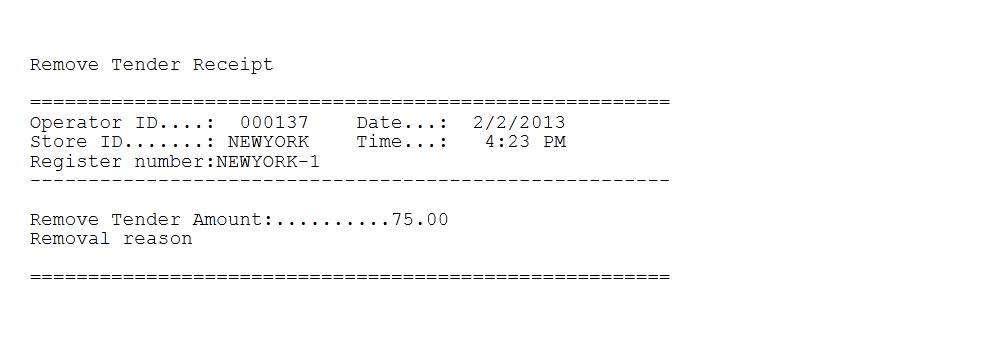
Step 3: retrieve the POS transactions, a store transaction is created for the type “Tender removal”.
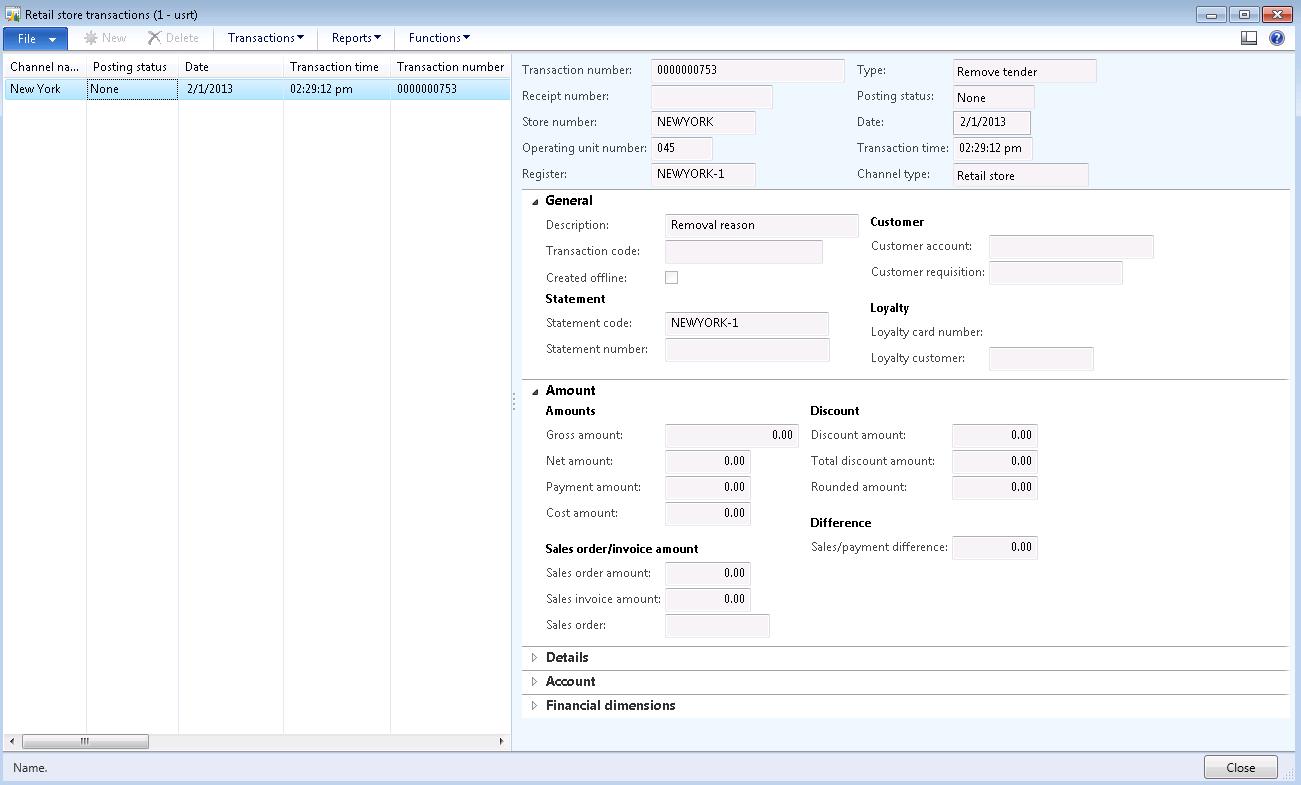
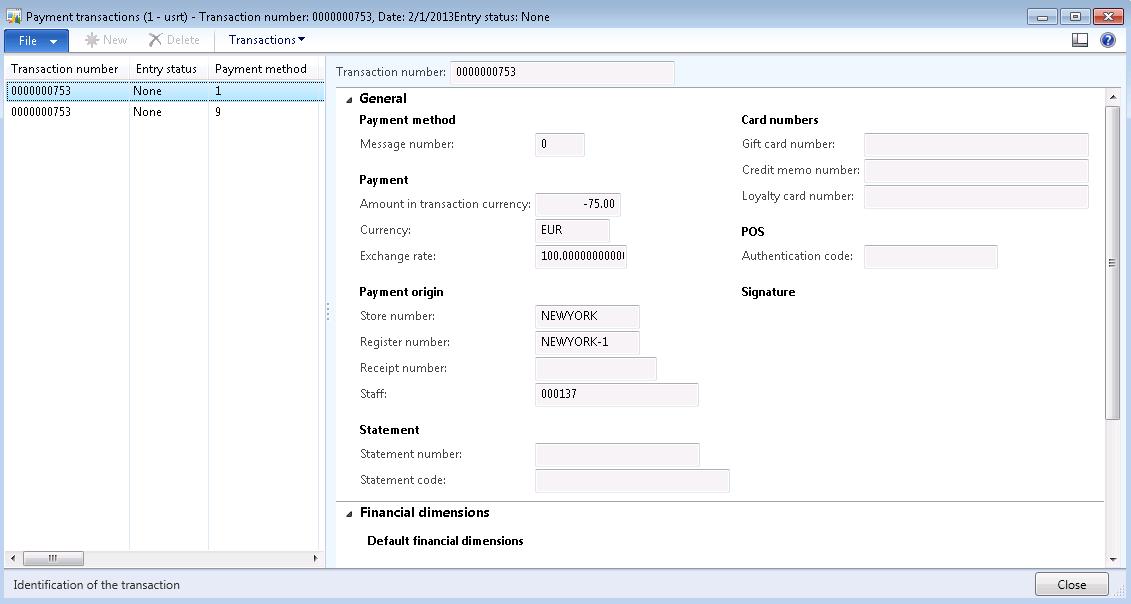
Step 4: open the linked payment transactions and you will notice that two transaction lines are created. One positive amount with the payment method 1 (Cash, operation name “Pay cash”) and one negative amount with payment method 9 (Tender Remove / Float, operation name “”).
Step 5: create and post the statement.
Step 6: review the posted statement. You will mention that the amount added to the drawer is posted.
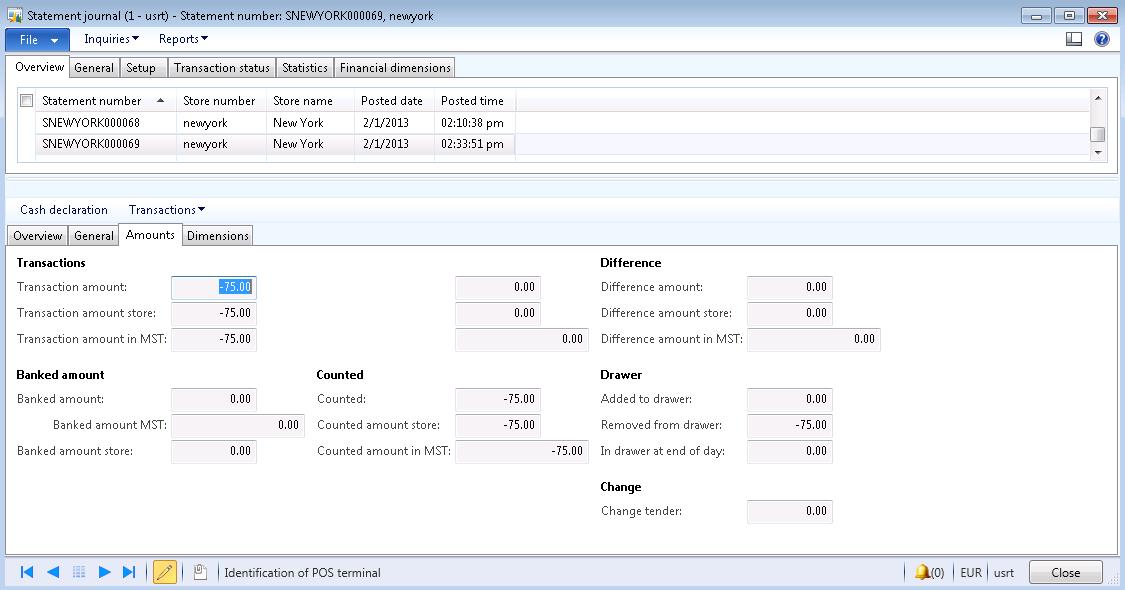
Step 7: review the ledger transactions. You will notice that no ledger transactions are created.
This should be part of future improvements.
Expense accounts
Record money that is removed from the cash drawer for occasional expenses.
Step 1: select the drawer option “Expense accounts”.
Step 2: declare the starting amount in POS currency and press ok. The Expense Account is printed.
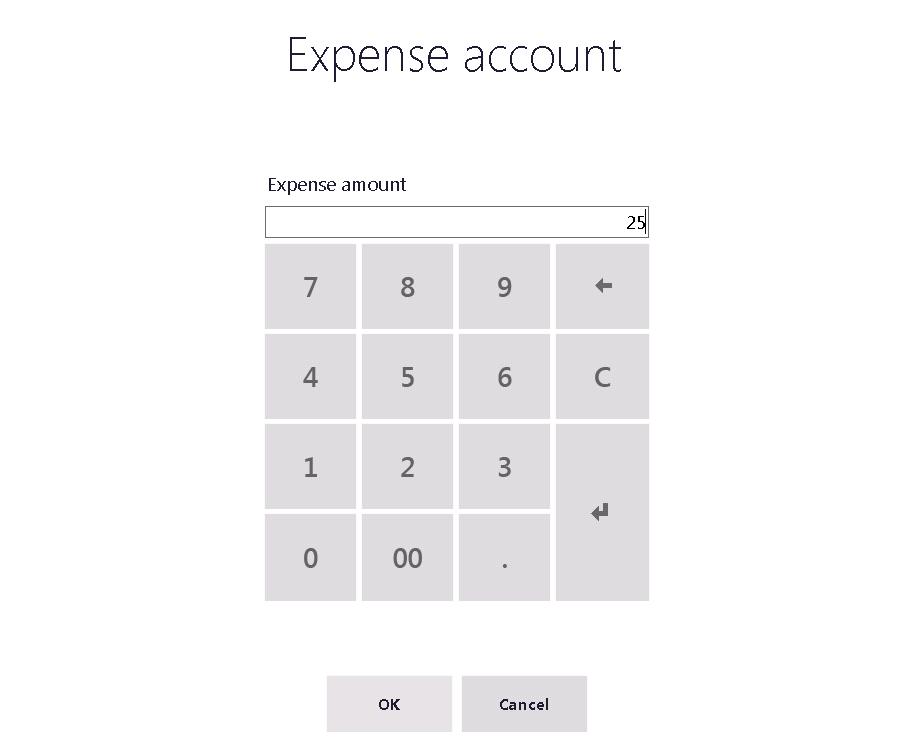
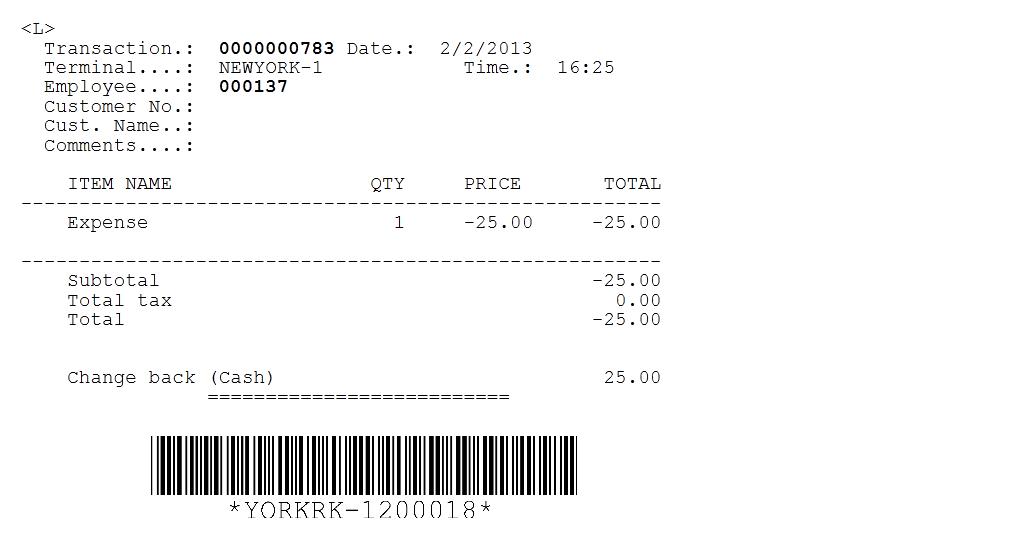
Step 3: the expense amount is created and needs to be taken from cash.
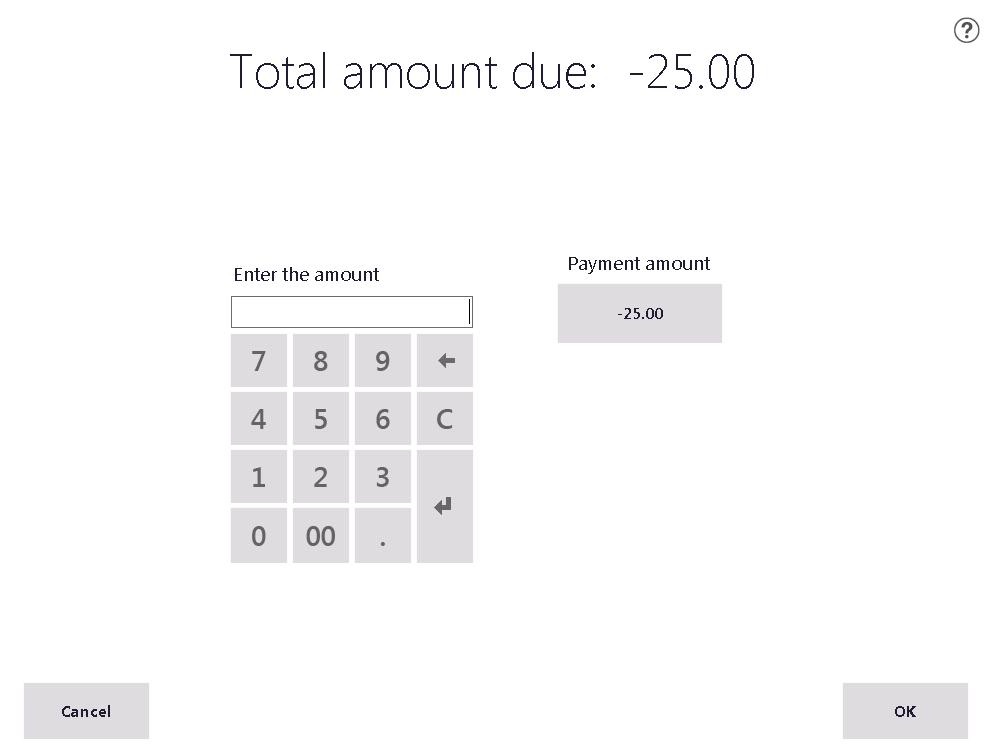
Step 4: retrieve the POS transactions, a store transaction is created for the type “Income expense”.
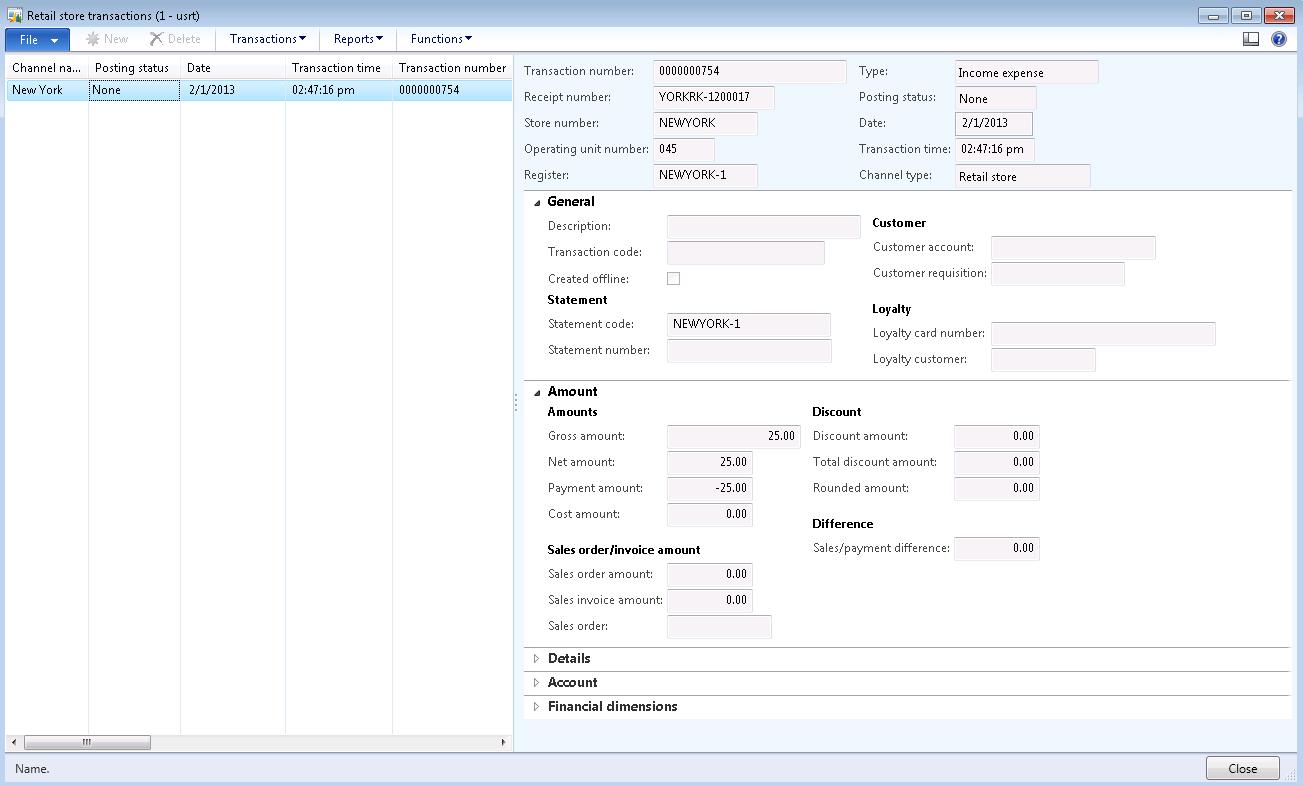
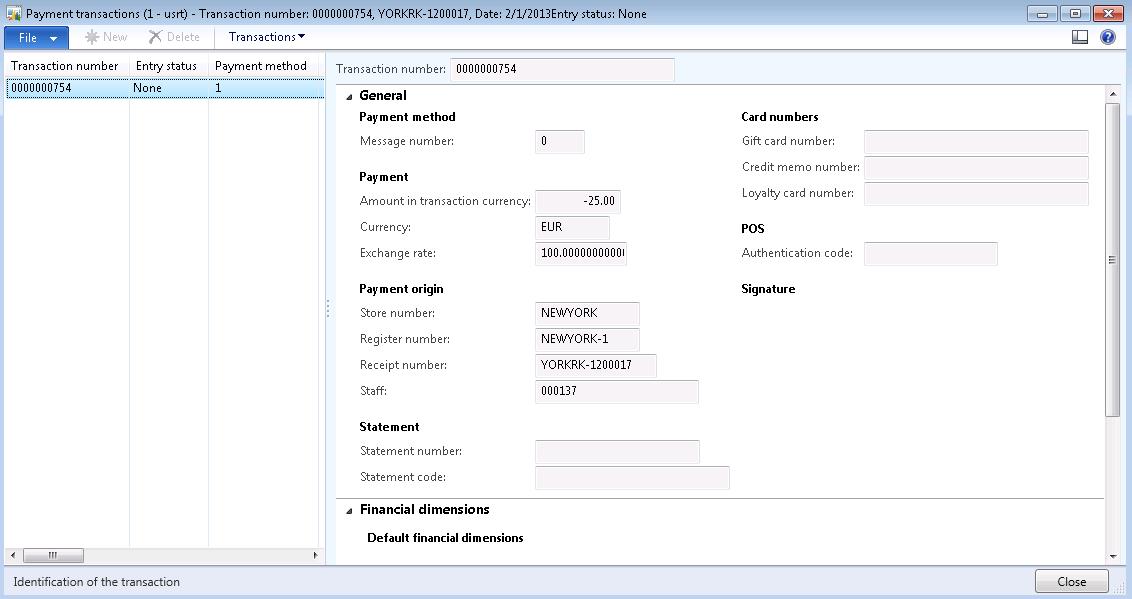
Step 5: open the linked payment transactions and you will notice that one transaction line is created with a negative amount with payment method 1 (Cash, operation name “Pay cash”).
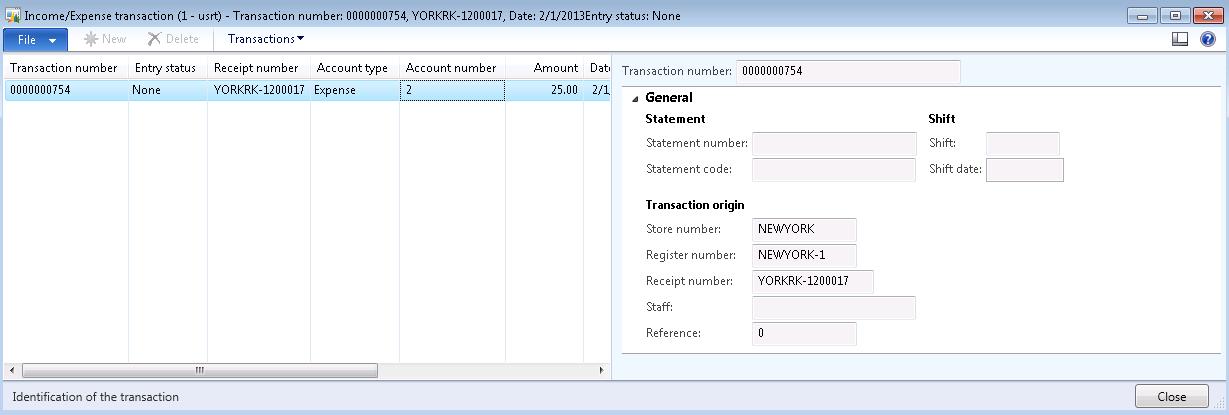
Step 6: open the linked income / expense transactions and you will notice that one transaction line is created with a positive amount with expensive type “Expense” and related account sequel number.
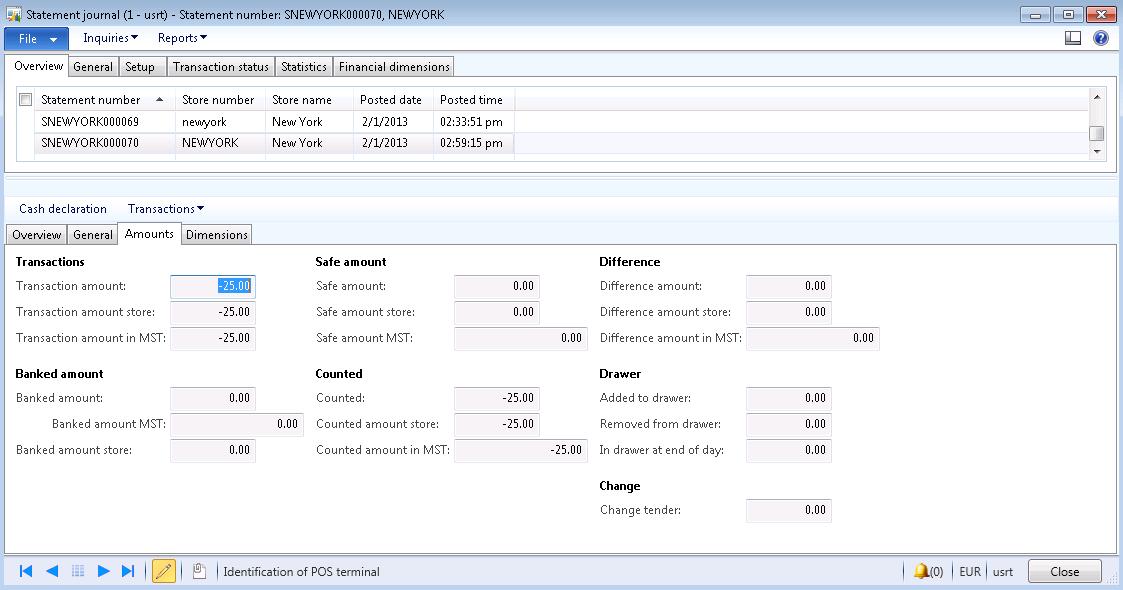
Step 7: create and post the statement.
Step 8: review the posted statement. You will mention that the amount retrieved from the drawer is posted.
Step 9: review the ledger transactions. You will notice that ledger transactions are created according the setup of the Store payment method.

Income accounts
Record money that is put into the cash drawer for a reason other than a sale, for example expense changes.
Step 1: select the drawer option “Income accounts”.
Step 2: declare the starting amount in POS currency and press ok.
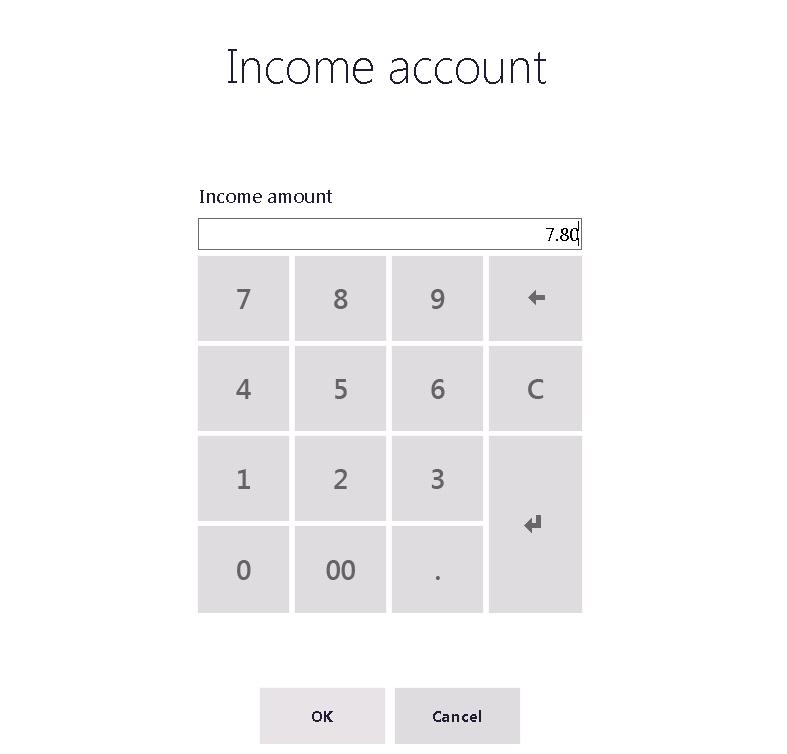
Step 3: the income amount is created and needs to be taken into cash. The Income Account is printed.
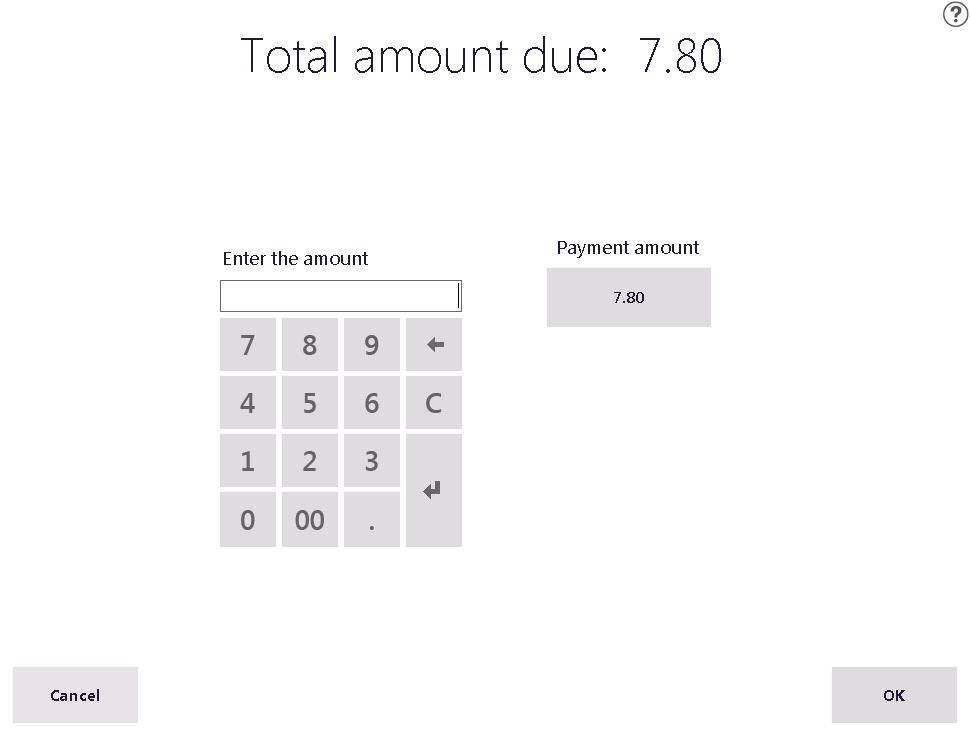
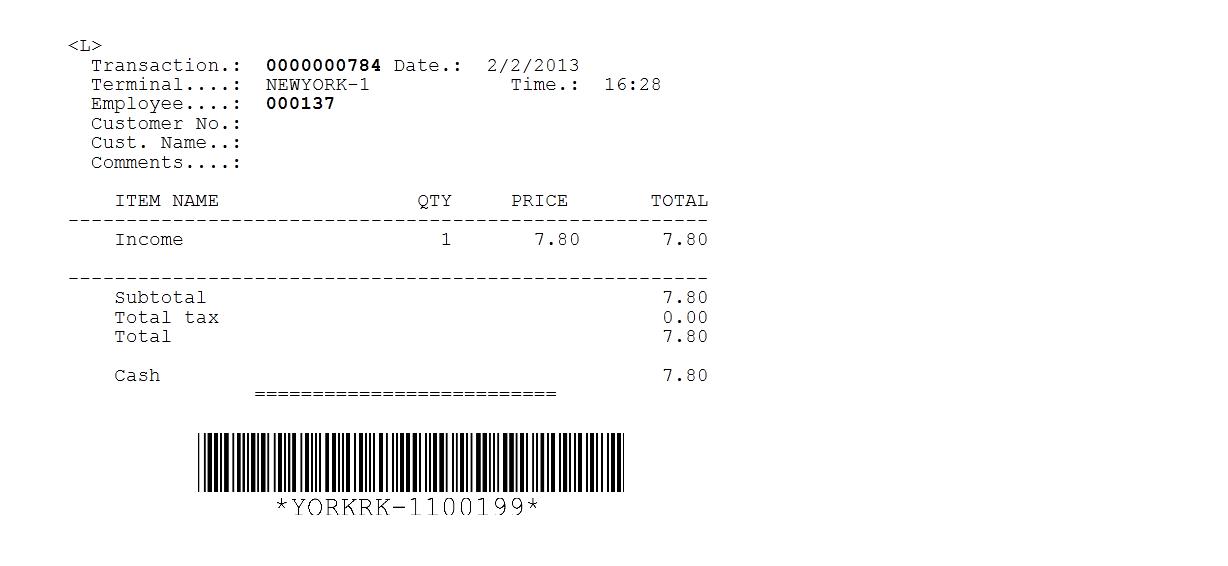
Step 4: retrieve the POS transactions, a store transaction is created for the type “Income expense”.
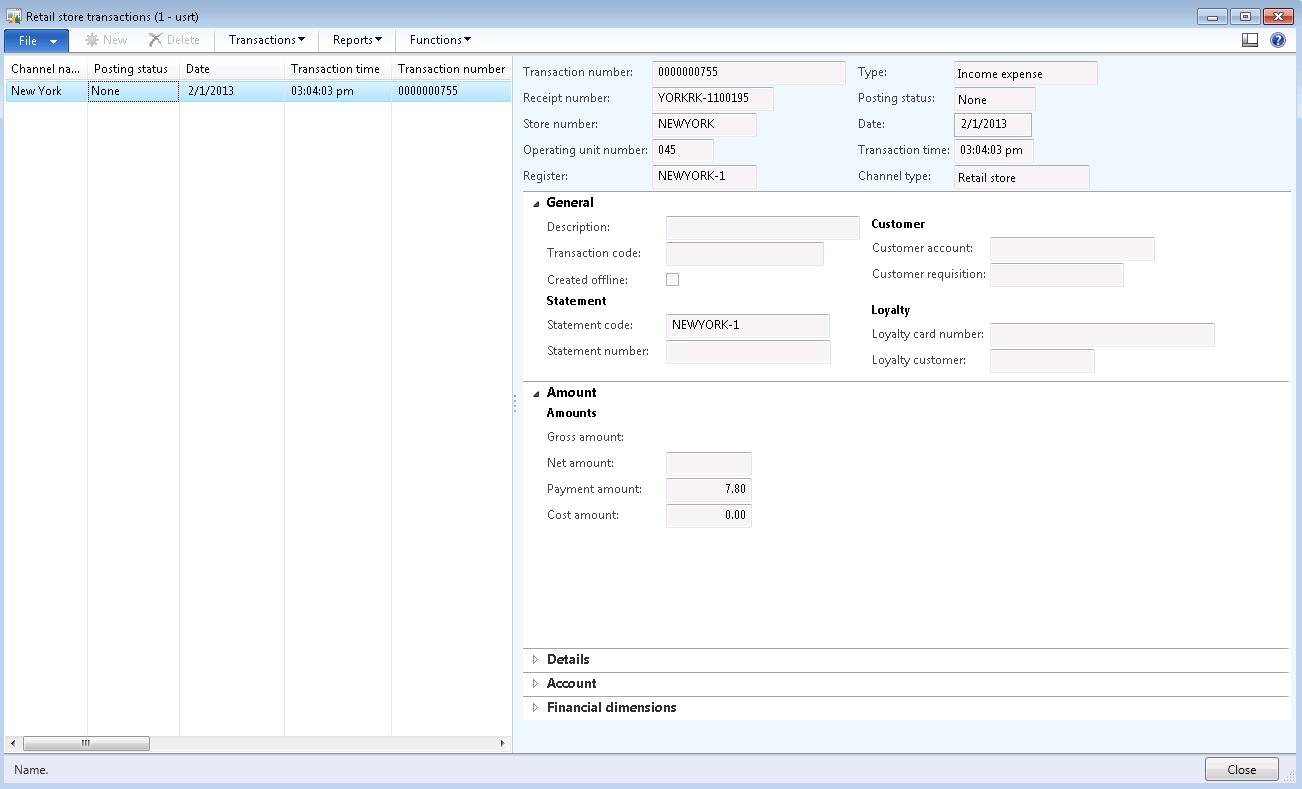
Step 5: open the linked payment transactions and you will notice that one transaction line is created with a positive amount with payment method 1 (Cash, operation name “Pay cash”).
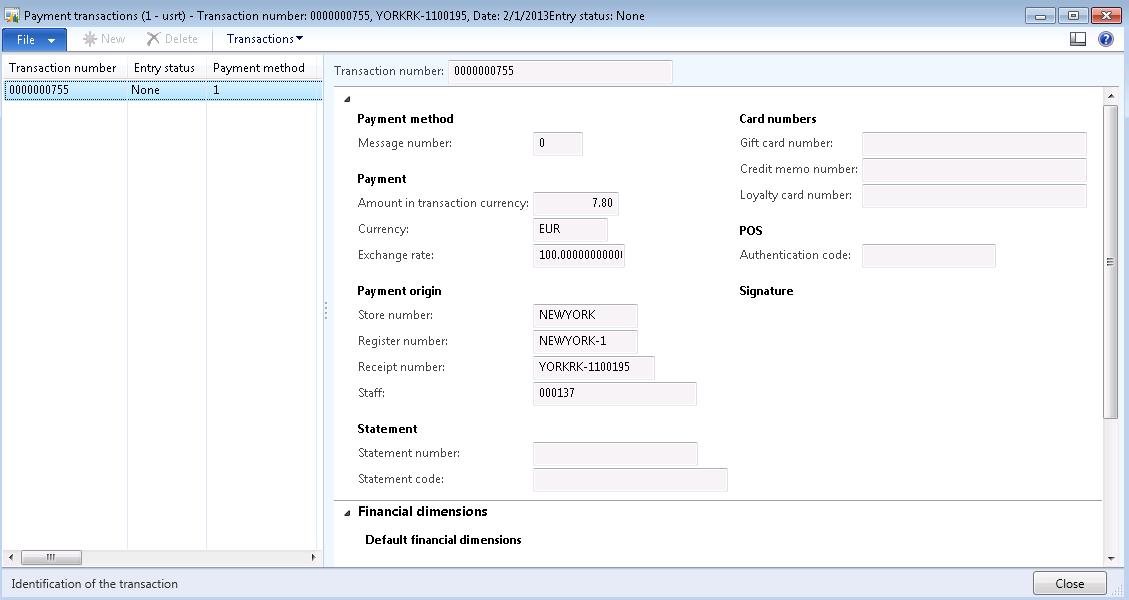
Step 6: open the linked income / expense transactions and you will notice that one transaction line is created with a positive amount with expensive type “Income” and related account sequel number.
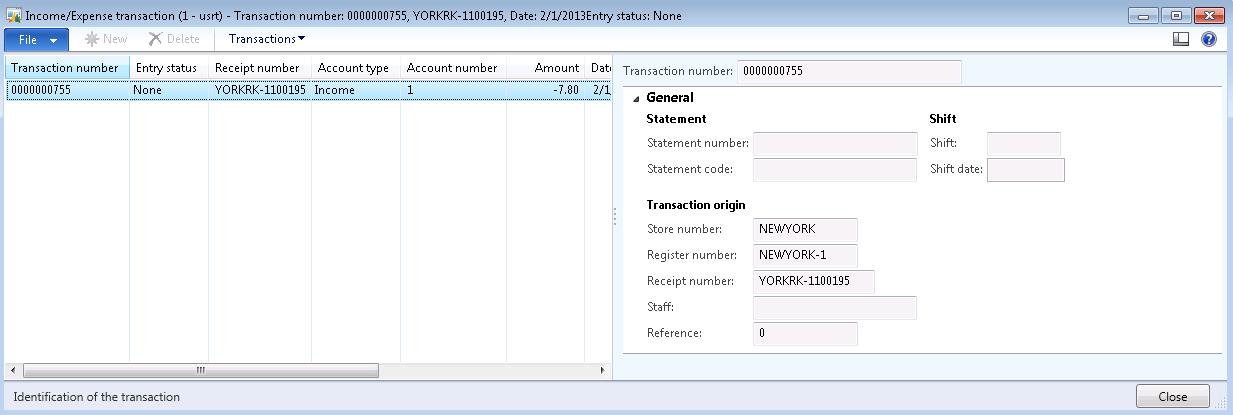
Step 7: create and post the statement.
Step 8: review the posted statement. You will mention that the amount added to the drawer is posted.
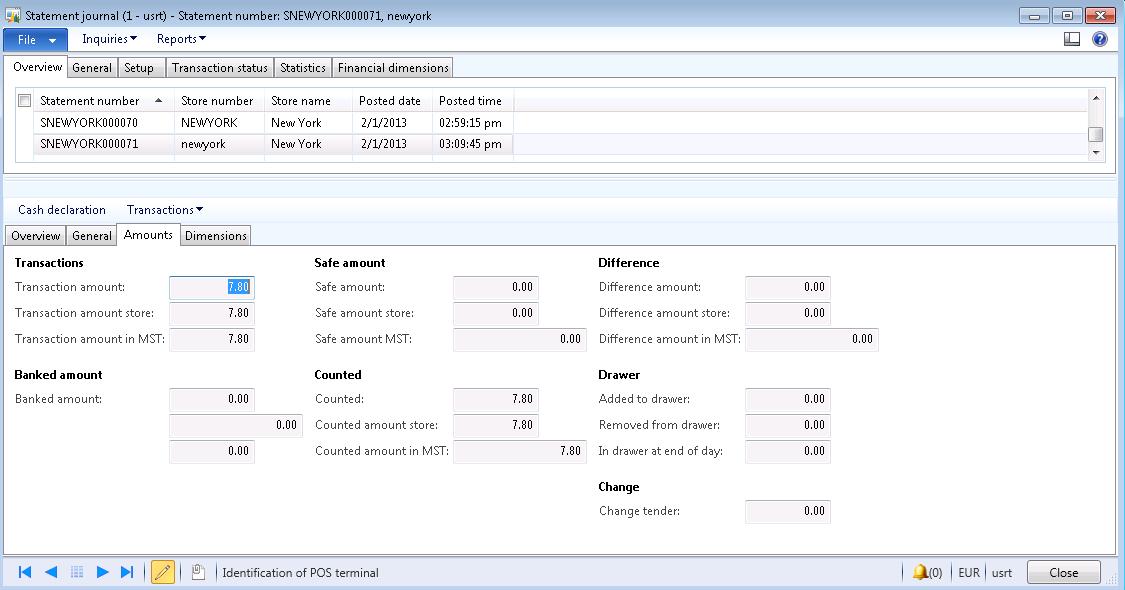
Step 9: review the ledger transactions. You will notice that ledger transactions are created according the setup of the Store payment method.

Safe drop
Perform a safe drop to move money from the register to a (temporary) safe.
Record the amount of money that is sent to the bank and other information, such as the number of the bank bag. Make a cash drop, which is also called a bank drop, to reduce the amount of money that is in the cash drawer.

When you logon again, the shift will continue.
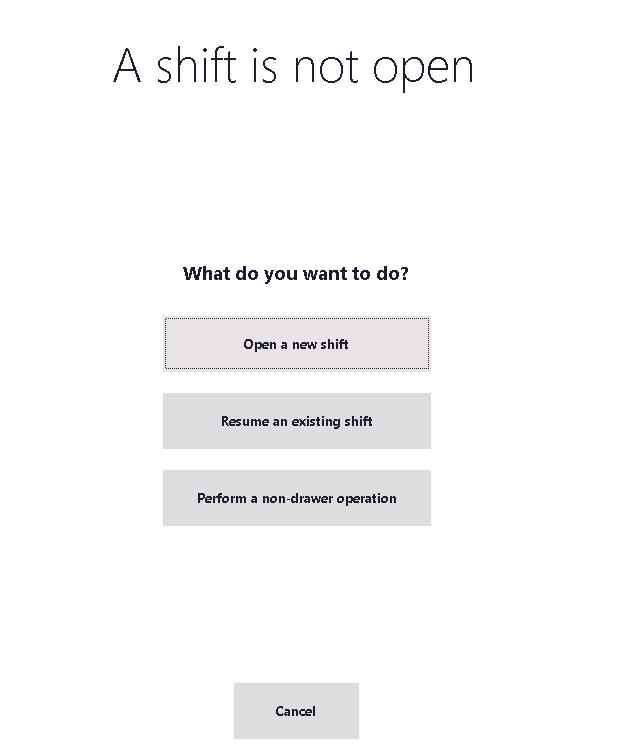
Step 2: select the resumed shift.
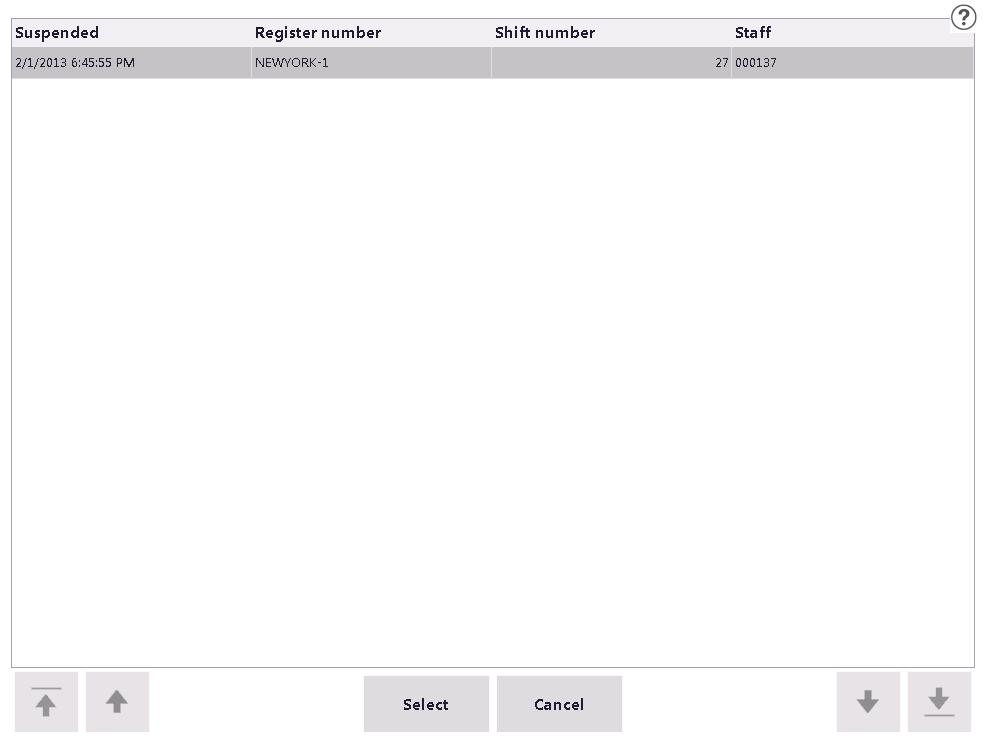
Step 3: retrieve the POS transactions, a store transaction is created for the type “Suspend shift”. The logon is created as store transaction of type “Logon”.
Step 4: create and post the statement.
Step 5: review the posted statement. You will mention that no further transactions are created.
Blind close
Set the current shift to blind close, and log off the cashier. Reason could be that you don’t want to count your draw at the terminal.
Step 1: select the drawer option “Blind close” and answer the question “Do you want to blind close the shift?” to “Yes”. The Shift Blind Close document is printed.
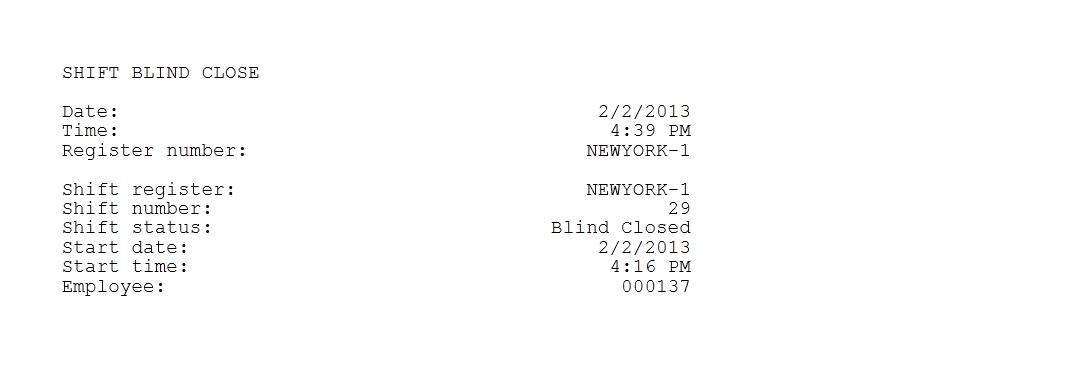
Step 2: the operation is marked as “Completed” and the cashier is logged of.
Step 3: retrieve the POS transactions, a store transaction is created for the type “Blind close shift”. The logon is created as store transaction of type “Logon”.
Step 4: create and post the statement.
Step 5: review the posted statement. You will mention that no further transactions are created.
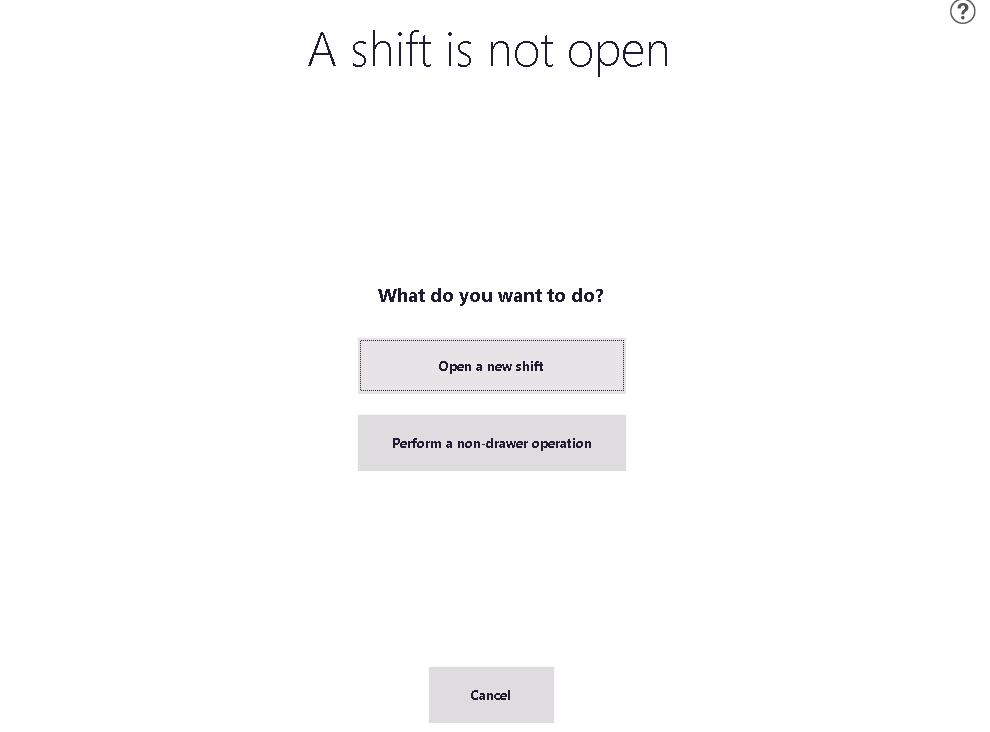
Step 6: logon again and select the procedure to “Perform a non-drawer operation”.
Step 7: select the option “View closed blind shifts”.
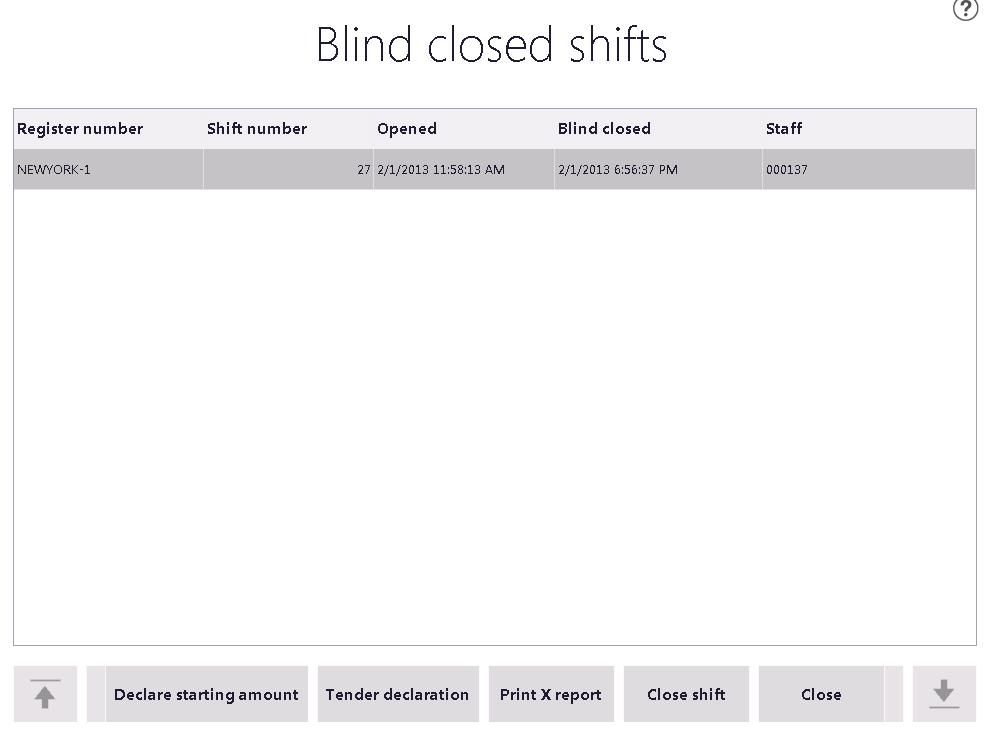
Step 8: select one of the next procedures to continue.
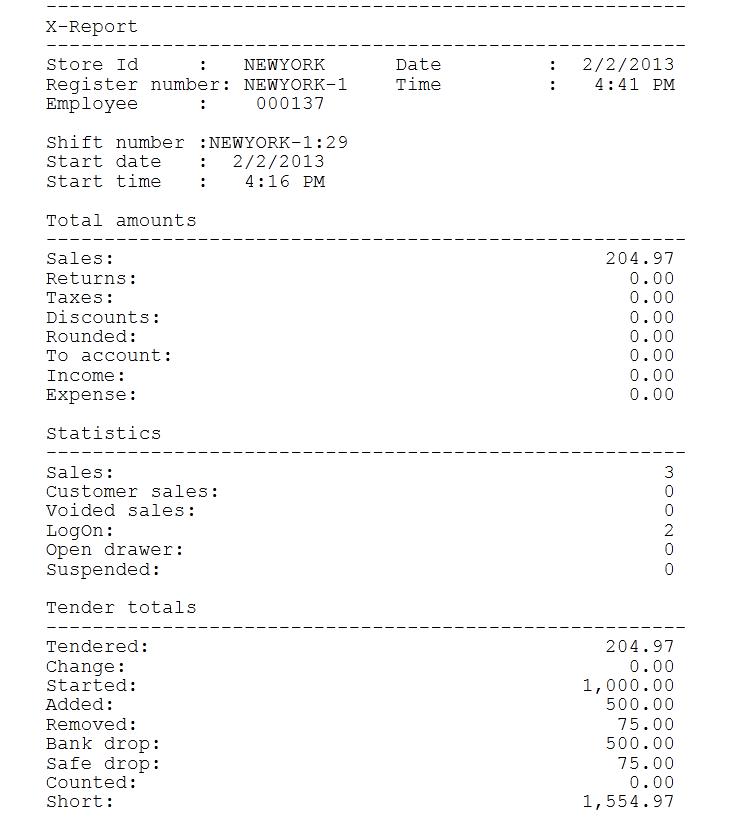
Step 9: optional: print the X-Report (overview of cumulative Shift transactions).
Tender declaration
This is a typically end of day scenario to release the cash drawer and put the amounts at a save place.
Step 1: select the drawer option “Tender declaration”.
Step 2: enter the amount from the POS in the tender declaration and press ok.
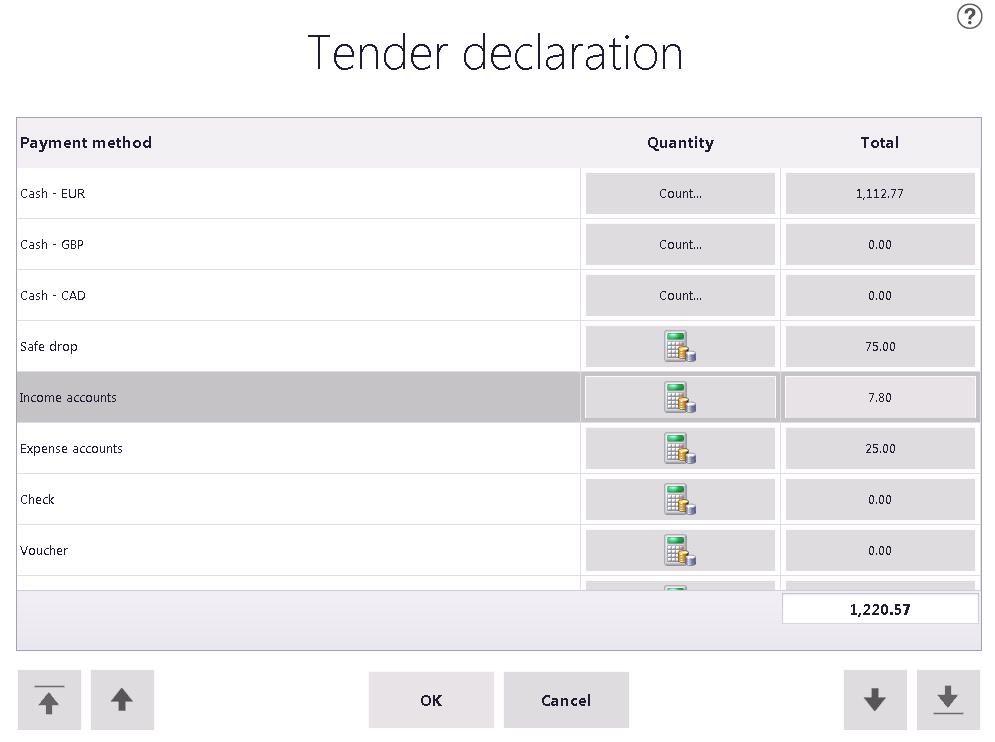
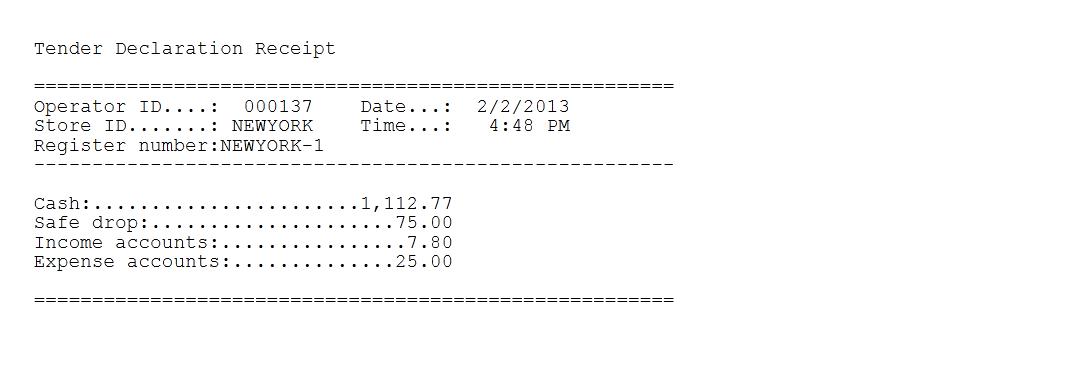
Step 3: answer the question “Are you sure that you want to write these amounts to the database?” with “Yes”. The Tender Declaration Receipt is printed.
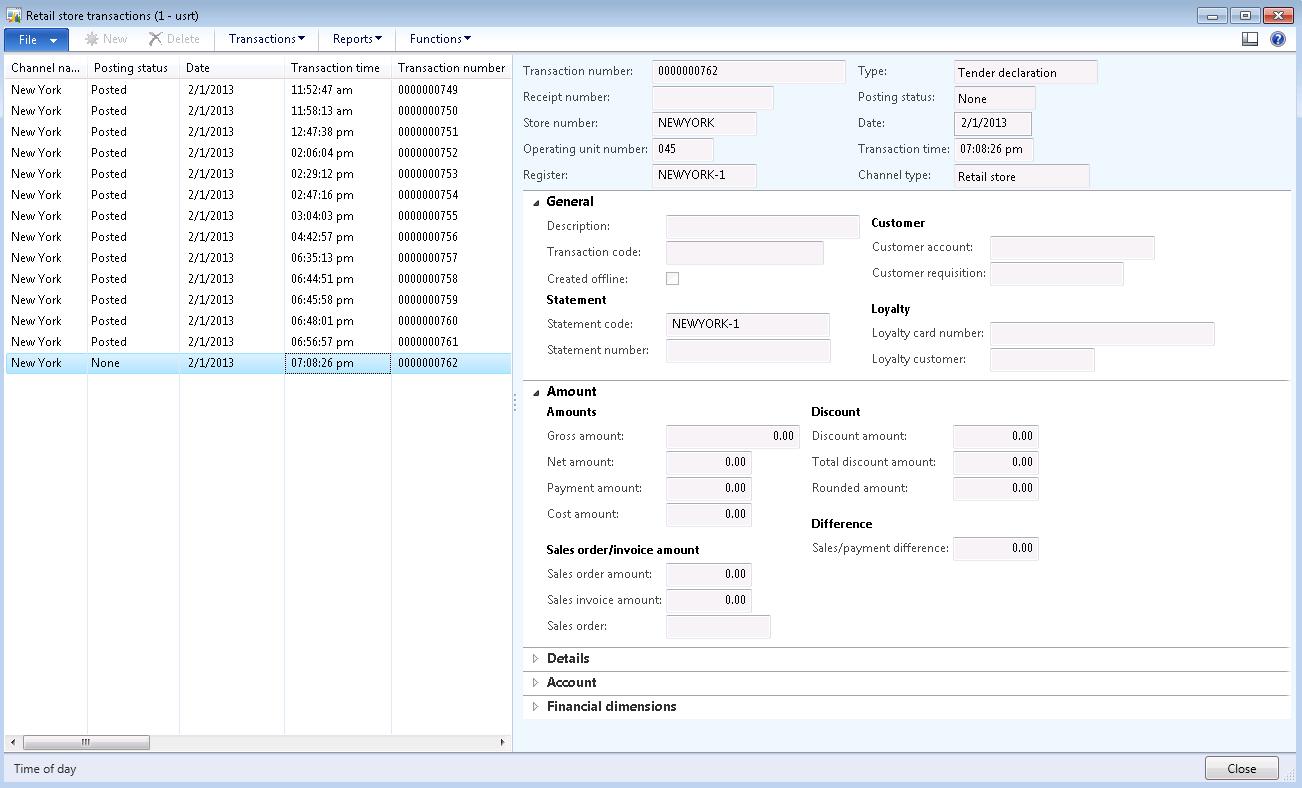
Step 4: retrieve the POS transactions, a store transaction is created for the type “Tender declaration”.
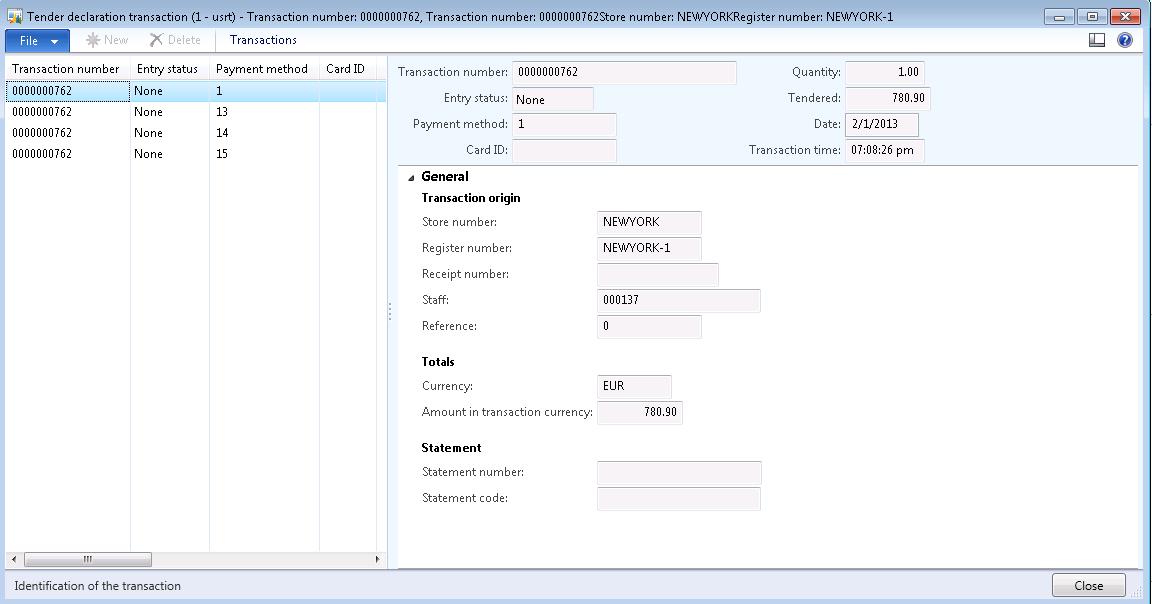
Step 5: open the linked tender declaration transactions and you will notice that new transaction lines are created for each selected payment method.
Step 6: create and post the statement.
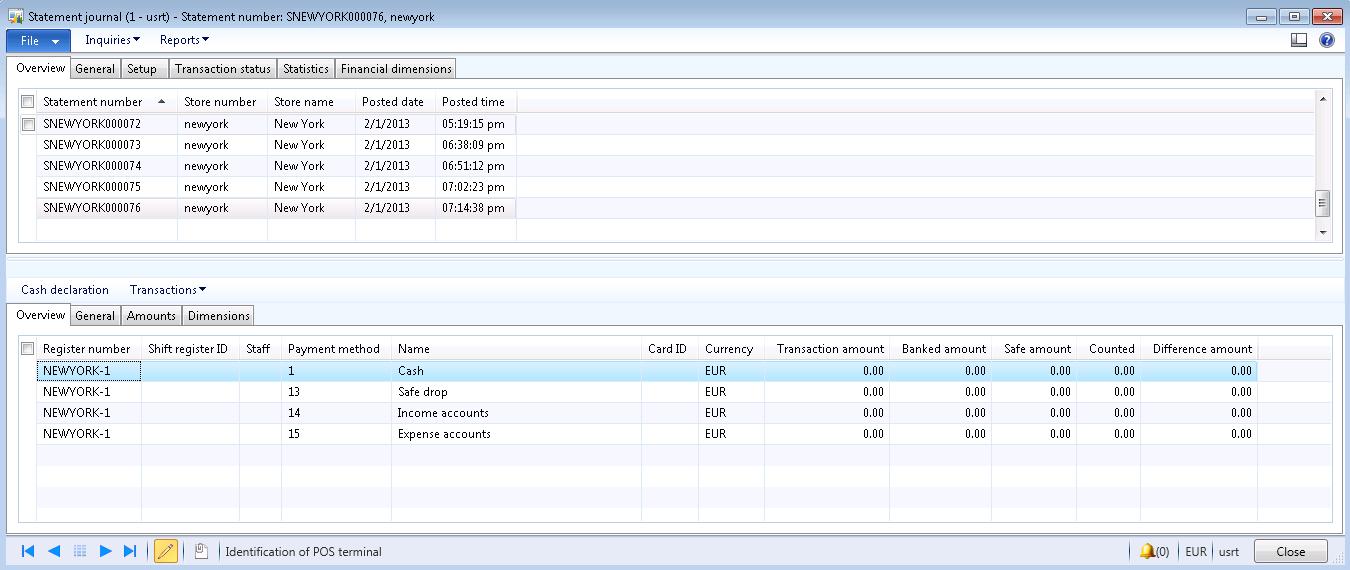
Step 7: review the posted statement.
Close shift
A cashier typically closes the register at the end of the day or work shift. This operation closes the current shift and opens a new shift. If both the store manager and the cashier count the drawer, they perform separate counts in step 2, and then type separate notes in the Tender Declaration form. If the store manager counts the cash drawer instead of the cashier, the manager first logs on to the register, and then completes the following steps.
Step 1: select Tender Declaration.
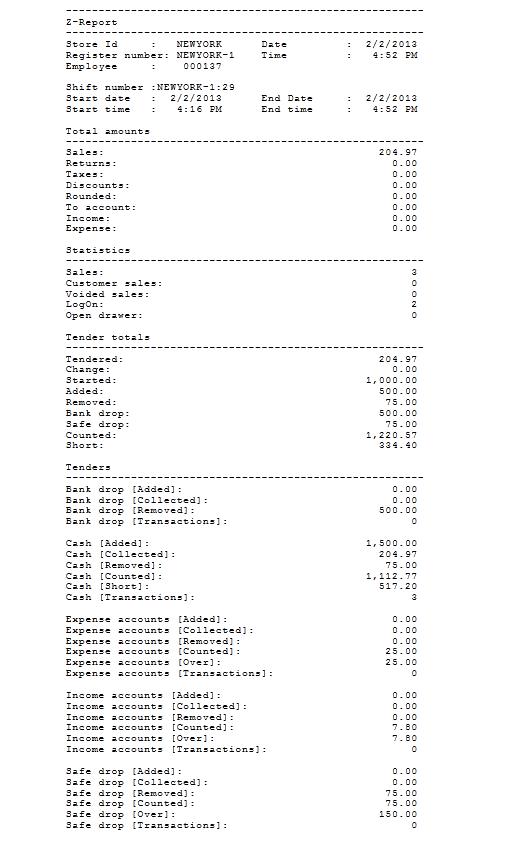
Step 2: count the contents of the cash drawer and enter the amounts in the Tender Declaration form. Answer the question “Do you want to close the shift?” with “Yes”, the retail POS closes the shift and prints a Z report. The operation is marked as “Completed”.

Step 3: verify that the counted amount in the cash drawer matches the expected amount on the Z report.
Step 4: retrieve the POS transactions, a store transaction is created for the type “Close shift”.
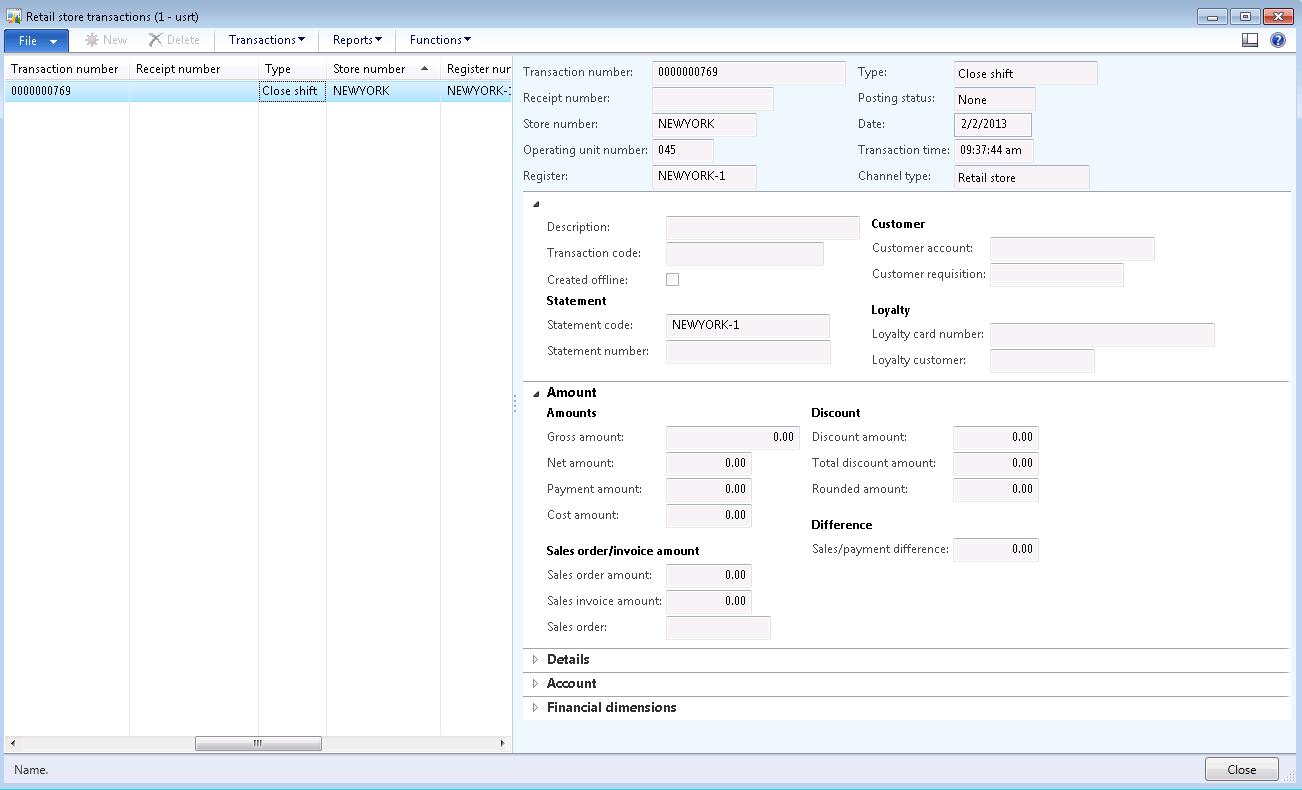
Step 5: create and post the statement.
Step 6: review the posted statement. You will mention that no further transactions are created.
Until next time Cheers!
Step 2: declare the amount in POS currency and press ok. The Removal Receipt is printed.


Step 3: retrieve the POS transactions, a store transaction is created for the type “Tender removal”.

Step 4: open the linked payment transactions and you will notice that two transaction lines are created. One positive amount with the payment method 1 (Cash, operation name “Pay cash”) and one negative amount with payment method 9 (Tender Remove / Float, operation name “”).

Step 5: create and post the statement.
Step 6: review the posted statement. You will mention that the amount added to the drawer is posted.

Step 7: review the ledger transactions. You will notice that no ledger transactions are created.
This should be part of future improvements.
Expense accounts
Record money that is removed from the cash drawer for occasional expenses.
Step 1: select the drawer option “Expense accounts”.
Step 2: declare the starting amount in POS currency and press ok. The Expense Account is printed.


Step 3: the expense amount is created and needs to be taken from cash.

Step 4: retrieve the POS transactions, a store transaction is created for the type “Income expense”.

Step 5: open the linked payment transactions and you will notice that one transaction line is created with a negative amount with payment method 1 (Cash, operation name “Pay cash”).

Step 6: open the linked income / expense transactions and you will notice that one transaction line is created with a positive amount with expensive type “Expense” and related account sequel number.

Step 7: create and post the statement.
Step 8: review the posted statement. You will mention that the amount retrieved from the drawer is posted.

Step 9: review the ledger transactions. You will notice that ledger transactions are created according the setup of the Store payment method.

Income accounts
Record money that is put into the cash drawer for a reason other than a sale, for example expense changes.
Step 1: select the drawer option “Income accounts”.
Step 2: declare the starting amount in POS currency and press ok.

Step 3: the income amount is created and needs to be taken into cash. The Income Account is printed.


Step 4: retrieve the POS transactions, a store transaction is created for the type “Income expense”.

Step 5: open the linked payment transactions and you will notice that one transaction line is created with a positive amount with payment method 1 (Cash, operation name “Pay cash”).

Step 6: open the linked income / expense transactions and you will notice that one transaction line is created with a positive amount with expensive type “Income” and related account sequel number.

Step 7: create and post the statement.
Step 8: review the posted statement. You will mention that the amount added to the drawer is posted.

Step 9: review the ledger transactions. You will notice that ledger transactions are created according the setup of the Store payment method.

Safe drop
Perform a safe drop to move money from the register to a (temporary) safe.
Step 1: select the drawer option “Safe drop” and answer the question “Are you sure you want to perform a safe drop?” to “Yes”.
Step 2: declare the amount in POS currency and press ok.
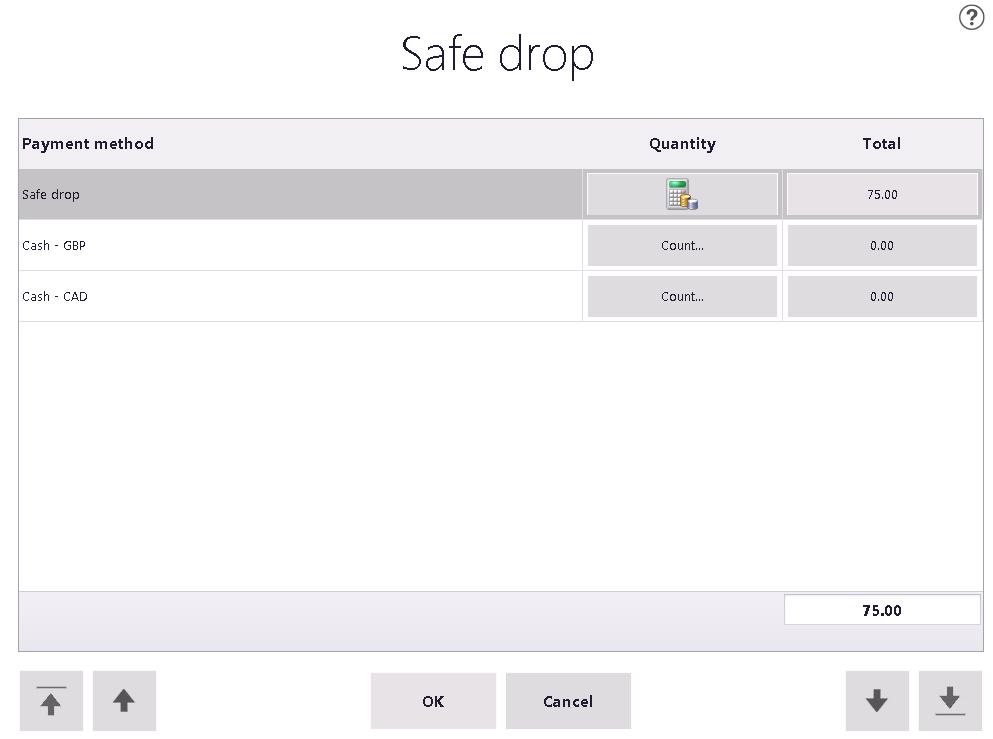
Step 3: answer the question “Are you sure that you want to write these amounts to the database?” with “Yes”.
Step 4: the transaction is created and needs to be taken from cash to the safe. The Safe Drop Receipt is printed.

Step 5: retrieve the POS transactions, a store transaction is created for the type “Safe drop”.
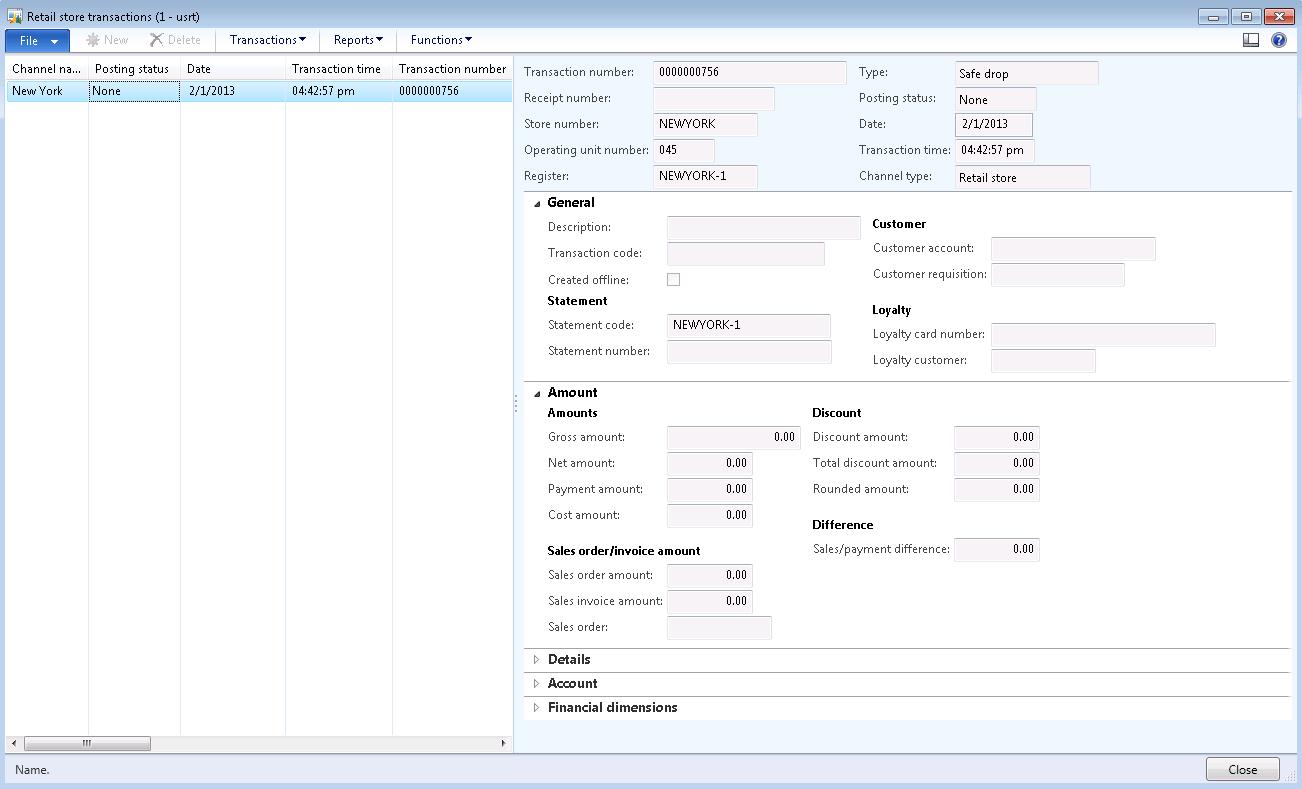
Step 6: open the linked safe tender transactions and you will notice that one transaction line is created with a positive amount with payment method 13 (Safe drop, operation name “Safe drop”).

Step 7: create and post the statement.
Step 8: review the posted statement. You will mention that the amount added to the safe box is posted.
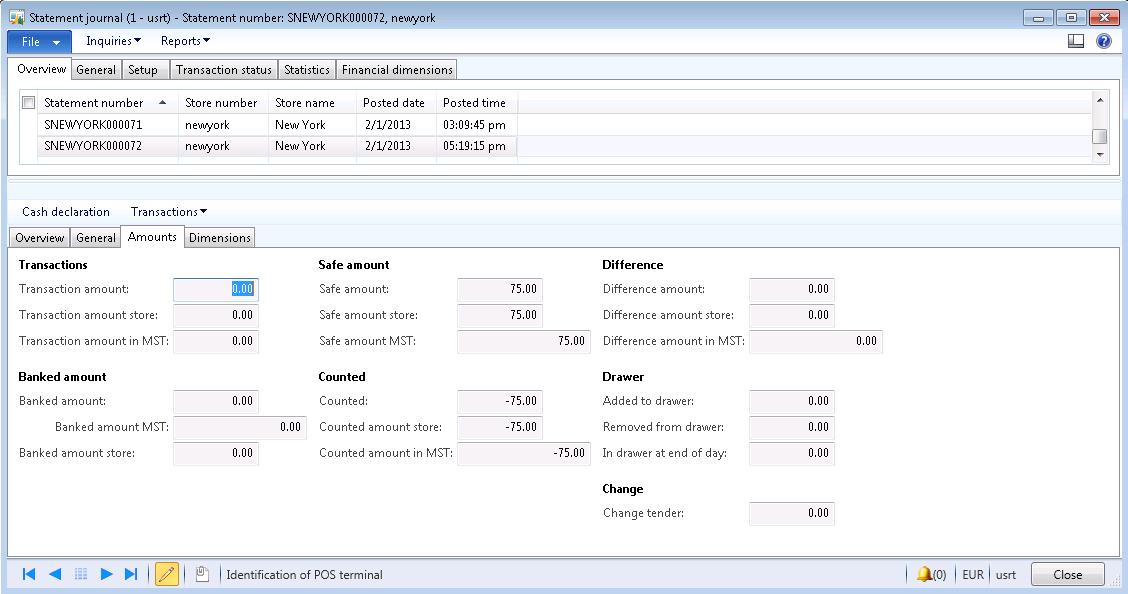
Step 9: review the ledger transactions. You will notice that ledger transactions are created according the setup of the Store payment method.

Bank dropStep 2: declare the amount in POS currency and press ok.

Step 3: answer the question “Are you sure that you want to write these amounts to the database?” with “Yes”.
Step 4: the transaction is created and needs to be taken from cash to the safe. The Safe Drop Receipt is printed.

Step 5: retrieve the POS transactions, a store transaction is created for the type “Safe drop”.

Step 6: open the linked safe tender transactions and you will notice that one transaction line is created with a positive amount with payment method 13 (Safe drop, operation name “Safe drop”).

Step 7: create and post the statement.
Step 8: review the posted statement. You will mention that the amount added to the safe box is posted.

Step 9: review the ledger transactions. You will notice that ledger transactions are created according the setup of the Store payment method.

Record the amount of money that is sent to the bank and other information, such as the number of the bank bag. Make a cash drop, which is also called a bank drop, to reduce the amount of money that is in the cash drawer.
Step 1: select the drawer option “Bank drop” and answer the question “Are you sure you want to perform a bank drop?” to “Yes”.
Step 2: declare the amount in POS currency and press ok.
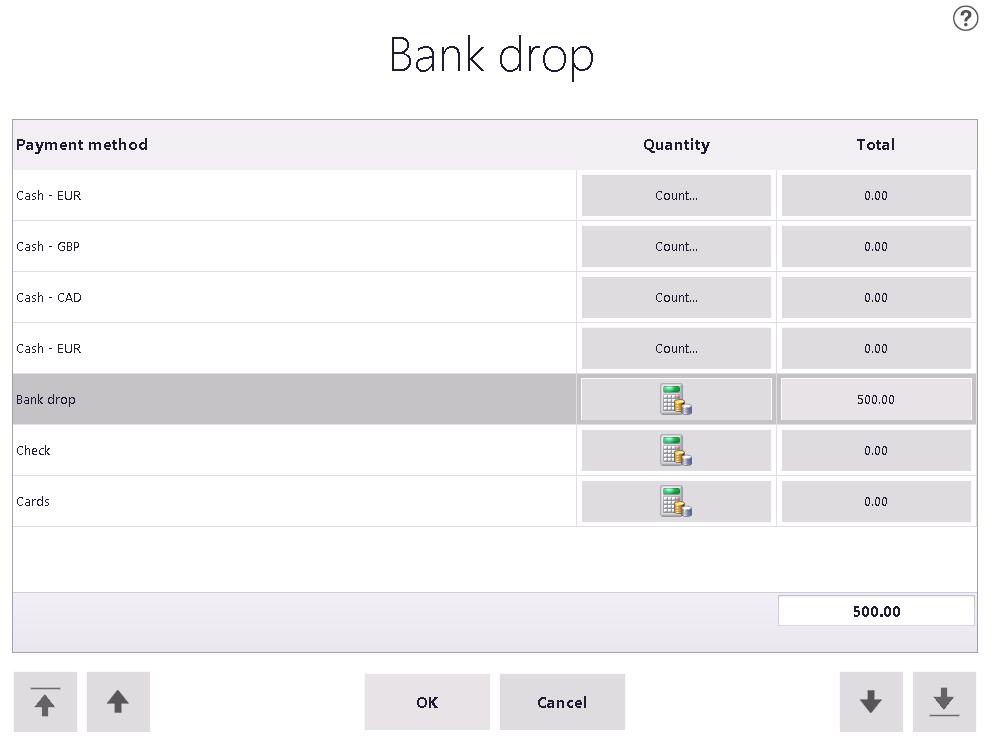
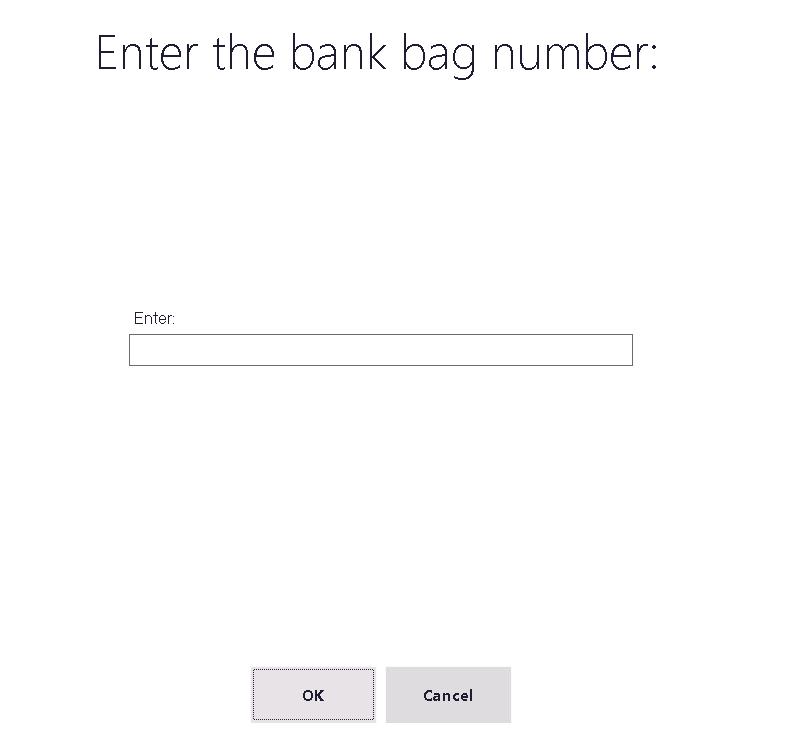
Step 3: answer the question “Are you sure that you want to write these amounts to the database?” with “Yes” and enter a bank bag number.
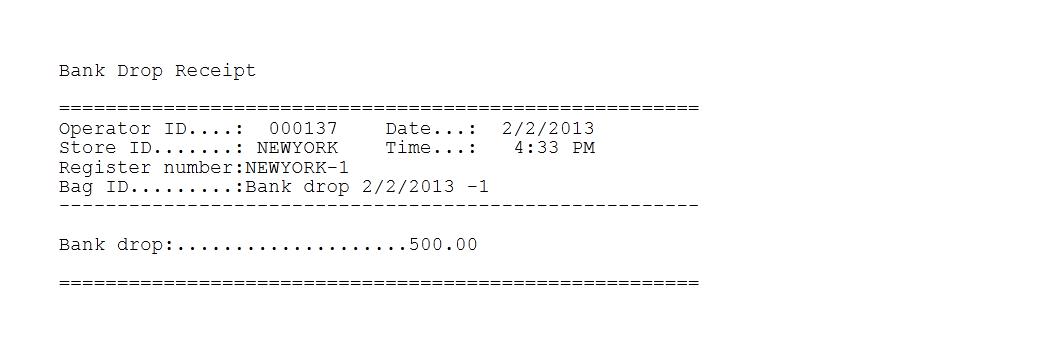
Step 4: the transaction is created and needs to be taken from cash to the bank. The Bank Drop Receipt is printed.
Step 5: retrieve the POS transactions, a store transaction is created for the type “Bank drop”.
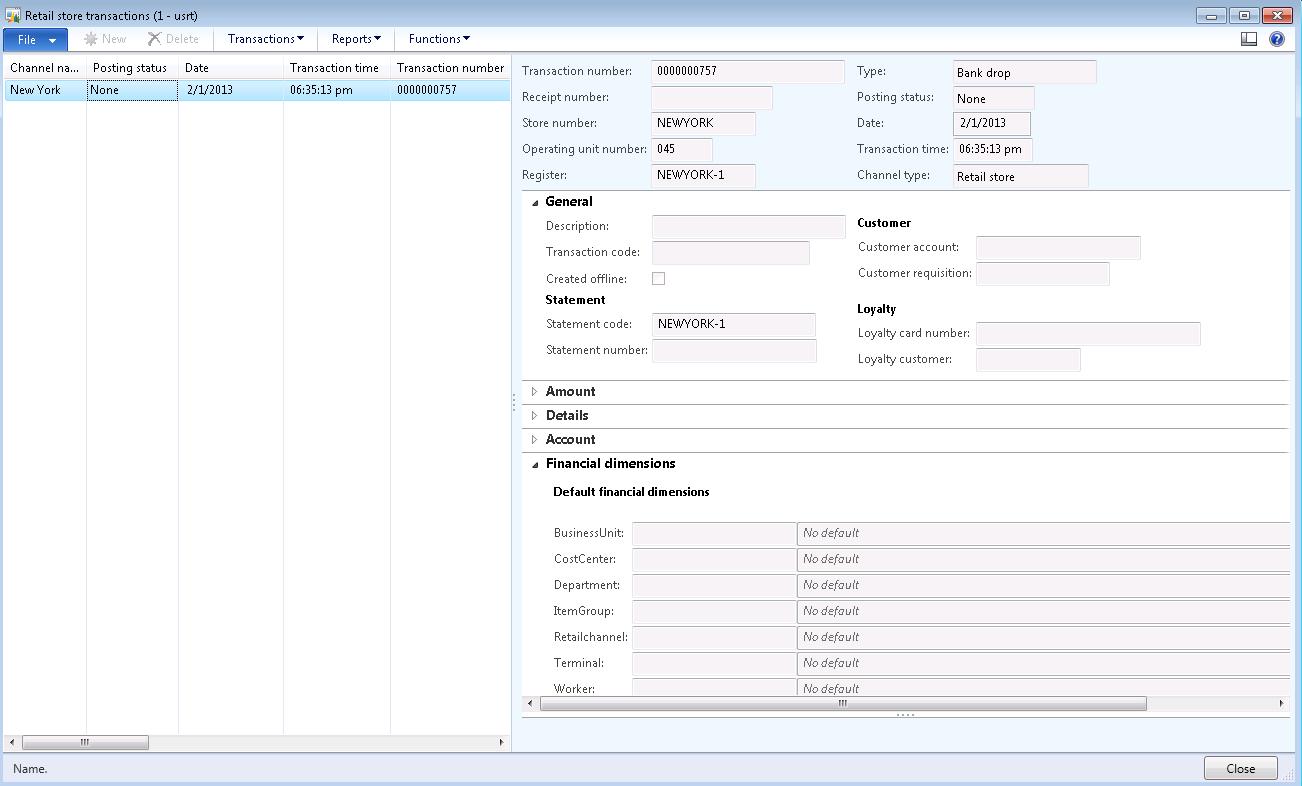
Step 6: open the linked banked tender transactions and you will notice that one transaction line is created with a positive amount with payment method 12 (Bank drop, operation name “B ank drop”).
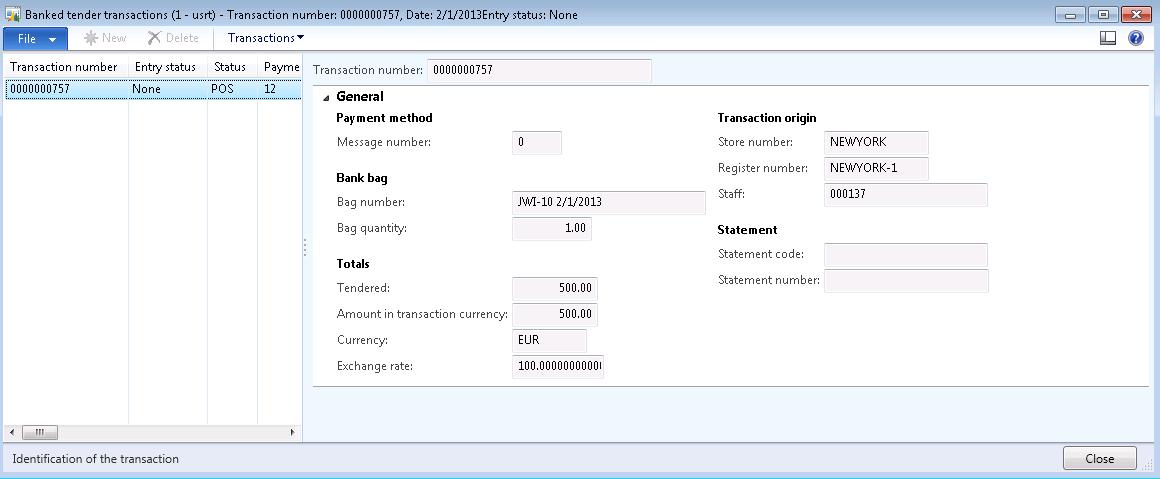
Step 7: create and post the statement.
Step 8: review the posted statement. You will mention that the amount added to the safe box is posted.
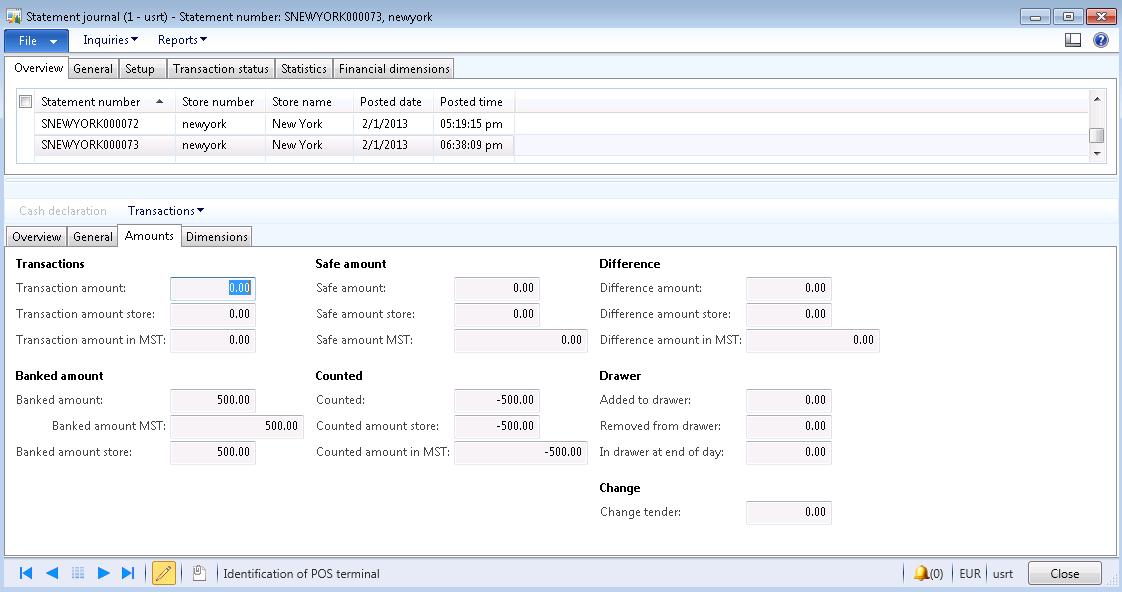
Step 9: review the ledger transactions. You will notice that no ledger transactions are created.
This should be part of future improvements.
Suspend shift and resume shift
Step 1: Suspend the current shift, and log off the current cashier. The Shift Suspended document is printed.Step 2: declare the amount in POS currency and press ok.

Step 3: answer the question “Are you sure that you want to write these amounts to the database?” with “Yes” and enter a bank bag number.

Step 4: the transaction is created and needs to be taken from cash to the bank. The Bank Drop Receipt is printed.

Step 5: retrieve the POS transactions, a store transaction is created for the type “Bank drop”.

Step 6: open the linked banked tender transactions and you will notice that one transaction line is created with a positive amount with payment method 12 (Bank drop, operation name “B ank drop”).

Step 7: create and post the statement.
Step 8: review the posted statement. You will mention that the amount added to the safe box is posted.

Step 9: review the ledger transactions. You will notice that no ledger transactions are created.
This should be part of future improvements.
Suspend shift and resume shift

When you logon again, the shift will continue.

Step 2: select the resumed shift.

Step 3: retrieve the POS transactions, a store transaction is created for the type “Suspend shift”. The logon is created as store transaction of type “Logon”.
Step 4: create and post the statement.
Step 5: review the posted statement. You will mention that no further transactions are created.
Blind close
Set the current shift to blind close, and log off the cashier. Reason could be that you don’t want to count your draw at the terminal.
Step 1: select the drawer option “Blind close” and answer the question “Do you want to blind close the shift?” to “Yes”. The Shift Blind Close document is printed.

Step 2: the operation is marked as “Completed” and the cashier is logged of.
Step 3: retrieve the POS transactions, a store transaction is created for the type “Blind close shift”. The logon is created as store transaction of type “Logon”.
Step 4: create and post the statement.
Step 5: review the posted statement. You will mention that no further transactions are created.
Step 6: logon again and select the procedure to “Perform a non-drawer operation”.
Step 7: select the option “View closed blind shifts”.

Step 8: select one of the next procedures to continue.
Step 9: optional: print the X-Report (overview of cumulative Shift transactions).

Tender declaration
This is a typically end of day scenario to release the cash drawer and put the amounts at a save place.
Step 1: select the drawer option “Tender declaration”.
Step 2: enter the amount from the POS in the tender declaration and press ok.

Step 3: answer the question “Are you sure that you want to write these amounts to the database?” with “Yes”. The Tender Declaration Receipt is printed.

Step 4: retrieve the POS transactions, a store transaction is created for the type “Tender declaration”.

Step 5: open the linked tender declaration transactions and you will notice that new transaction lines are created for each selected payment method.

Step 6: create and post the statement.
Step 7: review the posted statement.

Close shift
A cashier typically closes the register at the end of the day or work shift. This operation closes the current shift and opens a new shift. If both the store manager and the cashier count the drawer, they perform separate counts in step 2, and then type separate notes in the Tender Declaration form. If the store manager counts the cash drawer instead of the cashier, the manager first logs on to the register, and then completes the following steps.
Step 1: select Tender Declaration.
Step 2: count the contents of the cash drawer and enter the amounts in the Tender Declaration form. Answer the question “Do you want to close the shift?” with “Yes”, the retail POS closes the shift and prints a Z report. The operation is marked as “Completed”.

Step 3: verify that the counted amount in the cash drawer matches the expected amount on the Z report.
Step 4: retrieve the POS transactions, a store transaction is created for the type “Close shift”.

Step 5: create and post the statement.
Step 6: review the posted statement. You will mention that no further transactions are created.
Until next time Cheers!
Very interesting information and i really glad to getting this information.
ReplyDeleteCash Registers | pet shop
Its good and informative post, gives a lot of knowledge. retail epos i would like to see more from you....
ReplyDeleteThanks for some good retail epos write post ups. like to see more from you.
ReplyDeleteGreat blog created by you. pos software UK I read your blog, its best and useful information. You have done a good work.
ReplyDelete